Extend a Personal Network to Azure: Firewalla Configuration
July 21, 2023 - 3 min read (555 words)
A little over a year ago, I bought a Firewalla Gold to gate keep my home network. They are impressive pieces of hardware and are both easy to manage and powerful. The hardware specification itself is noteworthy:
- 4x Routable Gigabit Ethernet Controllers
- 4GB Memory
- 32GB SSD
- Intel Quad Core CPU
The internal software is based on
Ubuntu Linux and is easy managed via an
iOS app
or an
iPad app.
It also provides both a web interface and an ssh console. The company itself
was founded by
Cisco engineers. It offers a wide variety of features
that are immensely useful for home and small business users. Among them are
VPN servers and clients that support both
OpenVPN
and
WireGuard.
In this post, we will configure a Firewalla to use its VPN client feature to connect a home network to an Azure virtual network using an OpenVPN tunnel provided by the server that was created in the last post.
When following this guide, it is an excellent idea to ensure that your macOS hard drive is encrypted via FileVault and that your iCloud account is end-to-end encrypted via Advanced Data Protection.
Table of Contents
- Copy the Client Configuration to a Local Mac
- Airdrop the Configuration to an iPhone or iPad
- Configure the Firewalla VPN Client
- Configure the VPN Connection
Copy the Client Configuration to a Local Mac
The first step in this process is to securely copy the OpenVPN client configuration from the server where it was created to a local Mac. Use scp to move the file. The configuration file includes a private key.
scp vpn.private.jpatrickfulton.com:~/azure-personal-network.ovpn .Airdrop the Configuration to an iPhone or iPad
AirDrop provides a TLS secured mechanism to transfer the file to an iOS or iPadOS device. The file needs to be temporarily transferred to a device running the Firewalla app. Use this guide for details on how to establish the transfer.
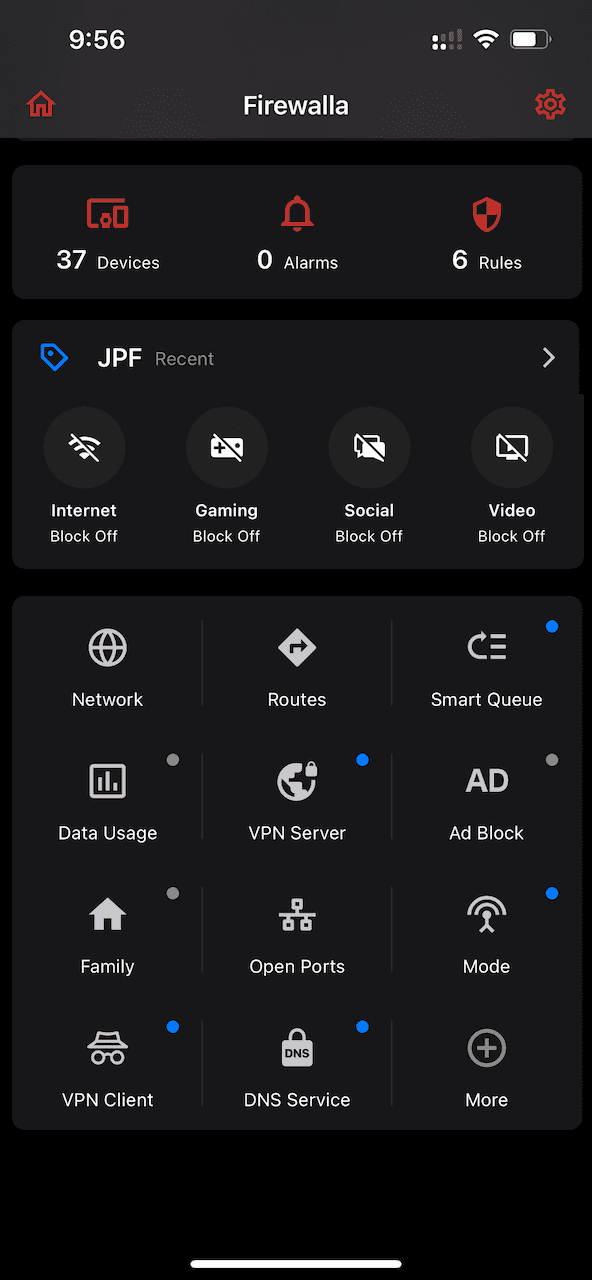
Configure the Firewalla VPN Client
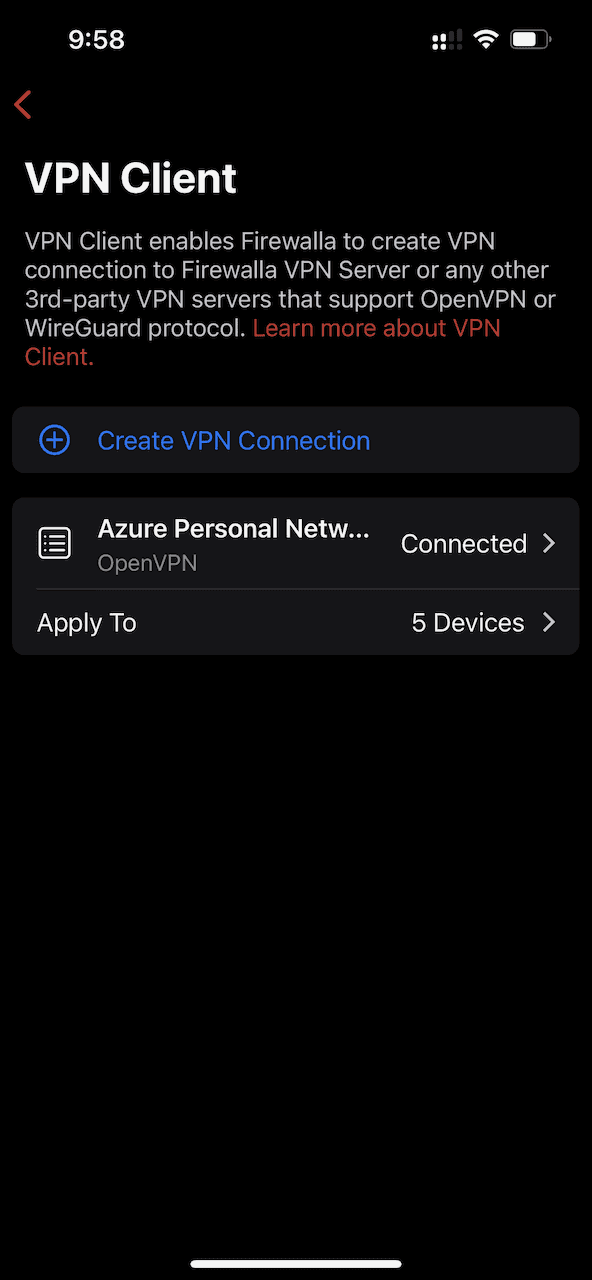
From the Firewalla home screen, select VPN Client.
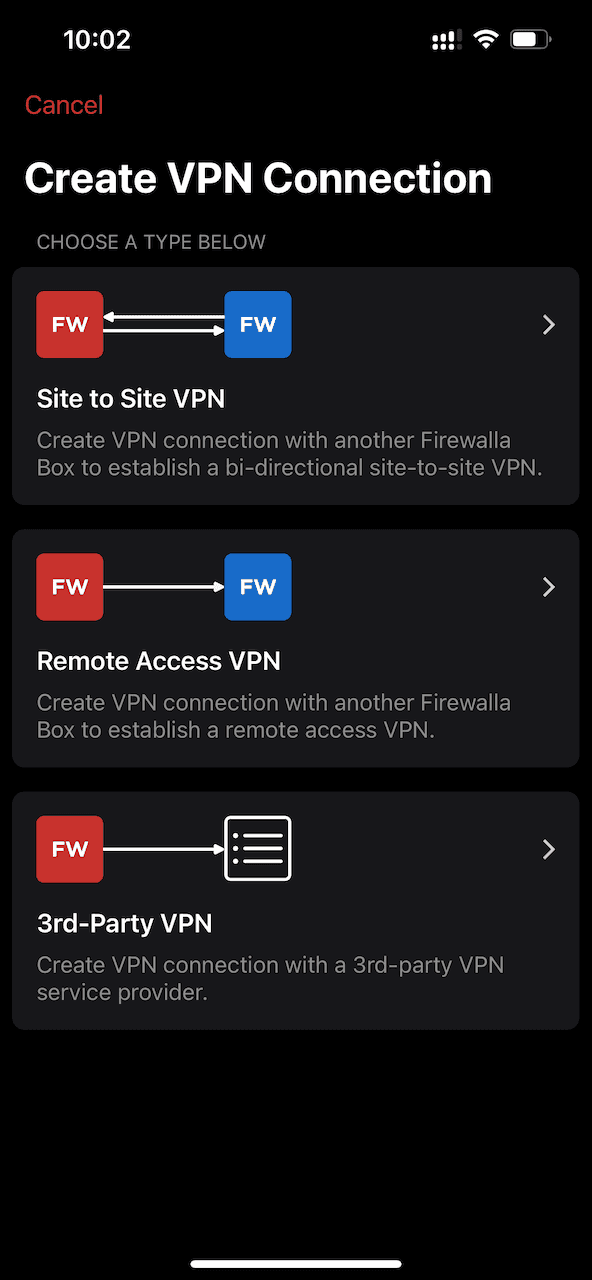
Select Create VPN Client > 3rd-Party VPN.
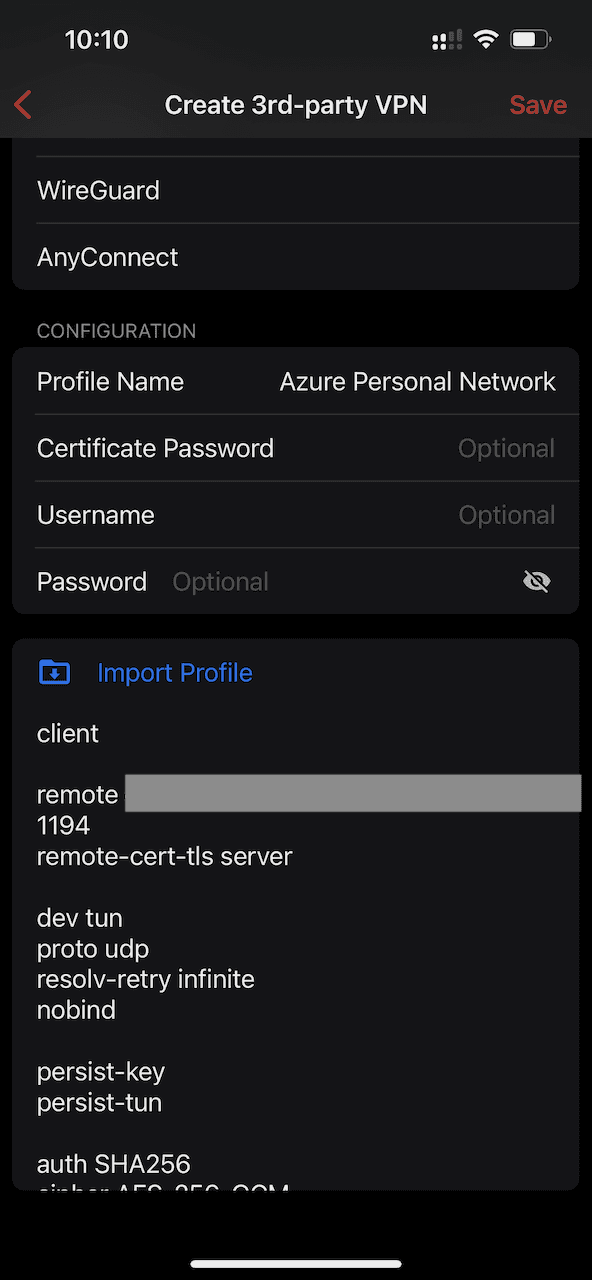
Select OpenVPN as the VPN Protocol. Provide a name for the profile under the Configuration section and then select Import Profile.
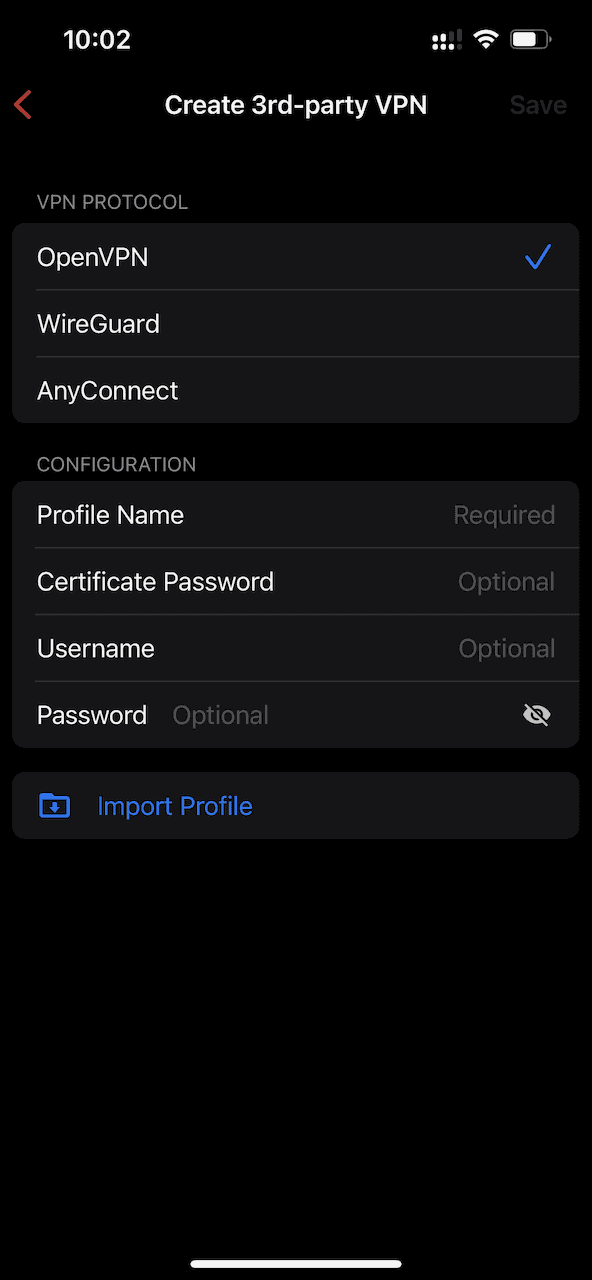
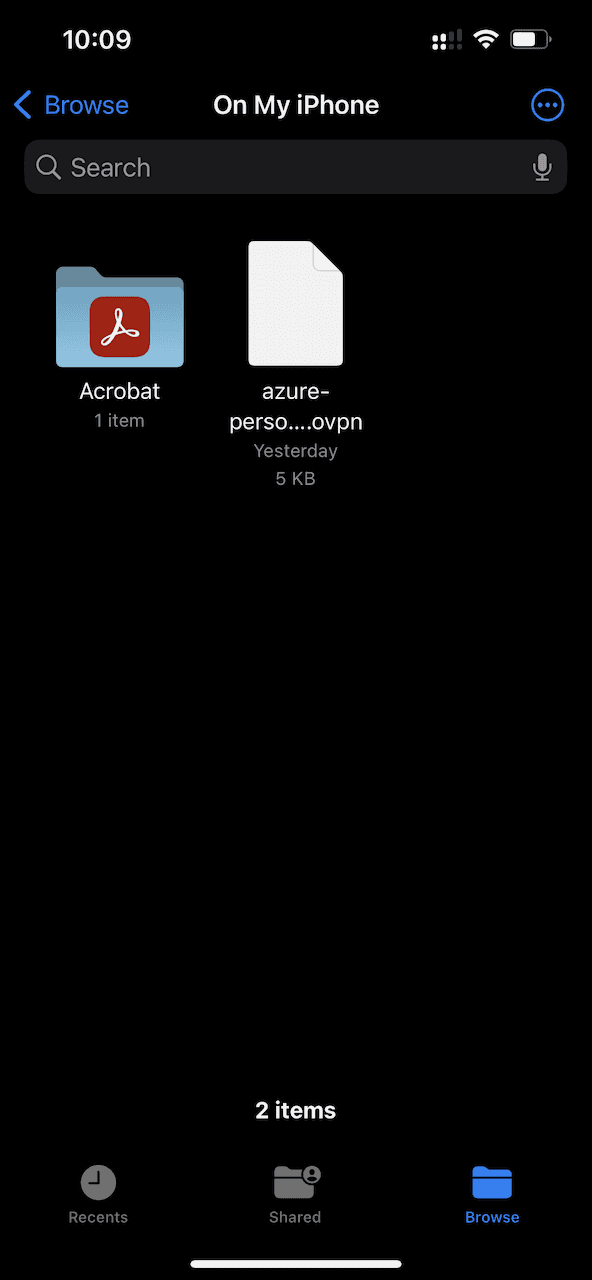
A file browser will be opened allowing you to navigate to the configuration file that was AirDropped in an earlier step.
Select Save to commit the changes to the device.
Configure the VPN Connection
From the VPN client screen, select Apply To to select groups of devices to apply the connection to. This should be a limited set. For example, there is no reason for IoT home devices to have access to the Azure virtual network. Similarly, gaming devices have no need for access either.
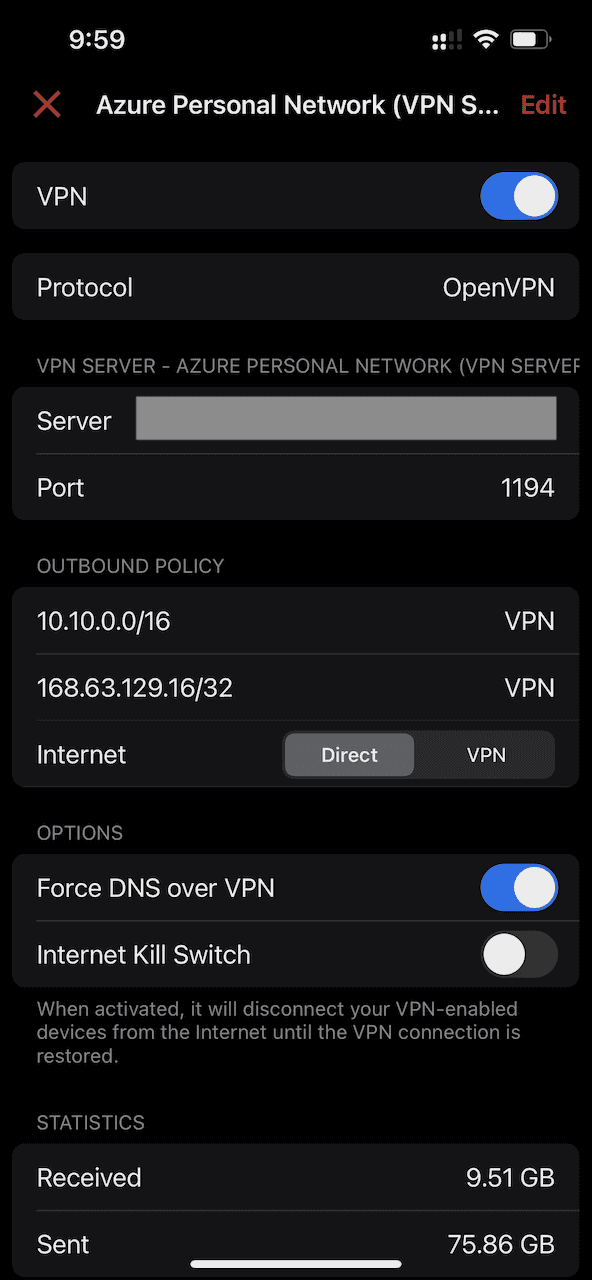
Click on the profile name of the VPN connection to set the final settings.
Make sure the Internet setting is set to Direct to ensure that only
private network traffic is routed through the VPN. Additionally, set
Force DNS over VPN to true to enable the private DNS zone to be served
to the selected devices.
The VPN connection will start automatically upon save.

Written by J. Patrick Fulton.