Extend a Personal Network to Azure: OpenVPN Server
July 21, 2023 - 11 min read (2141 words)
In an earlier post, we created an Azure VPN Gateway to provide remote access to our virtual network. While powerful, these resources are both expensive at an SKU that supports multiple platforms and are likely overkill as a solution for small business networks. They may are best suited for enterprise deployments. In this post, we will create a Ubuntu virtual machine that supports similar functionality at a lower price point.
Table of Contents
Create a Virtual Machine
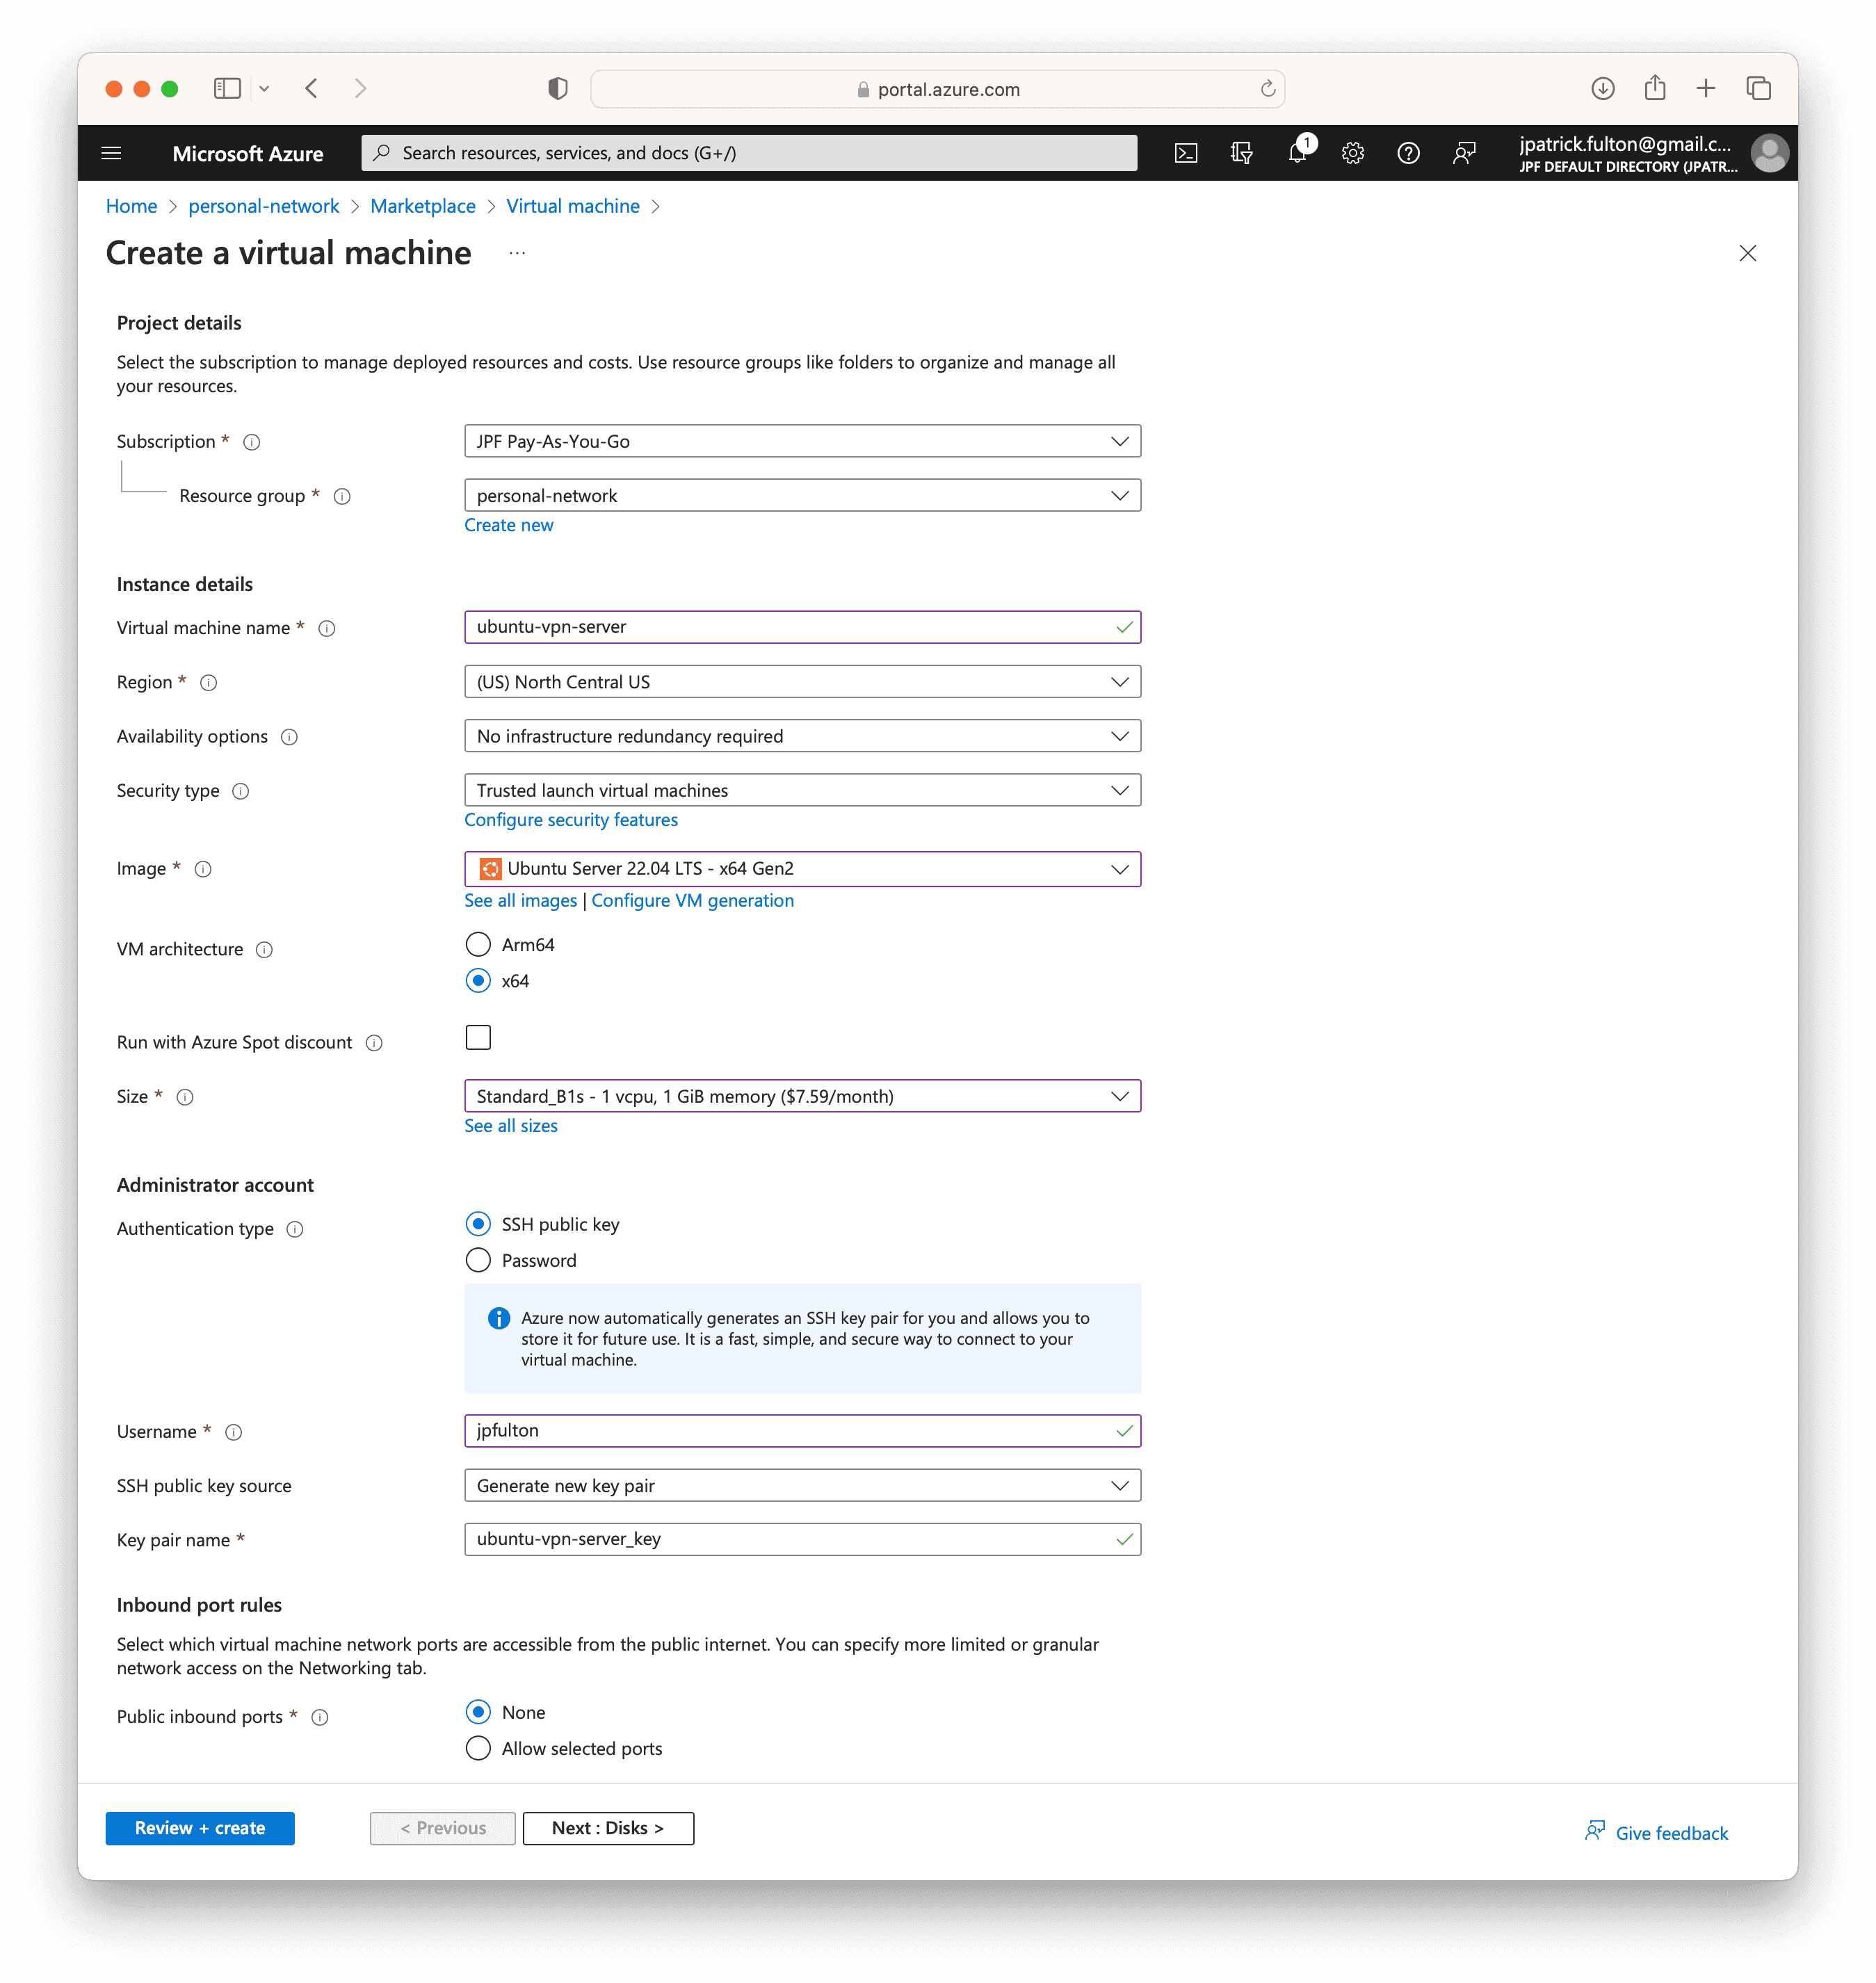
Firstly, we need to create a virtual machine attached to our existing virtual network and in the resource group to host the OpenVPN tunnel. From the Azure portal, navigate to the resource group and select Create from the toolbar. Search for virtual machine in the Marketplace and select Create.
On the create virtual machine screen, provide a name for the server, select
Ubuntu Server 22.04 LTS as the image and select Standard_B2s as the
size. Supply an initial username and then select Next: Disks.
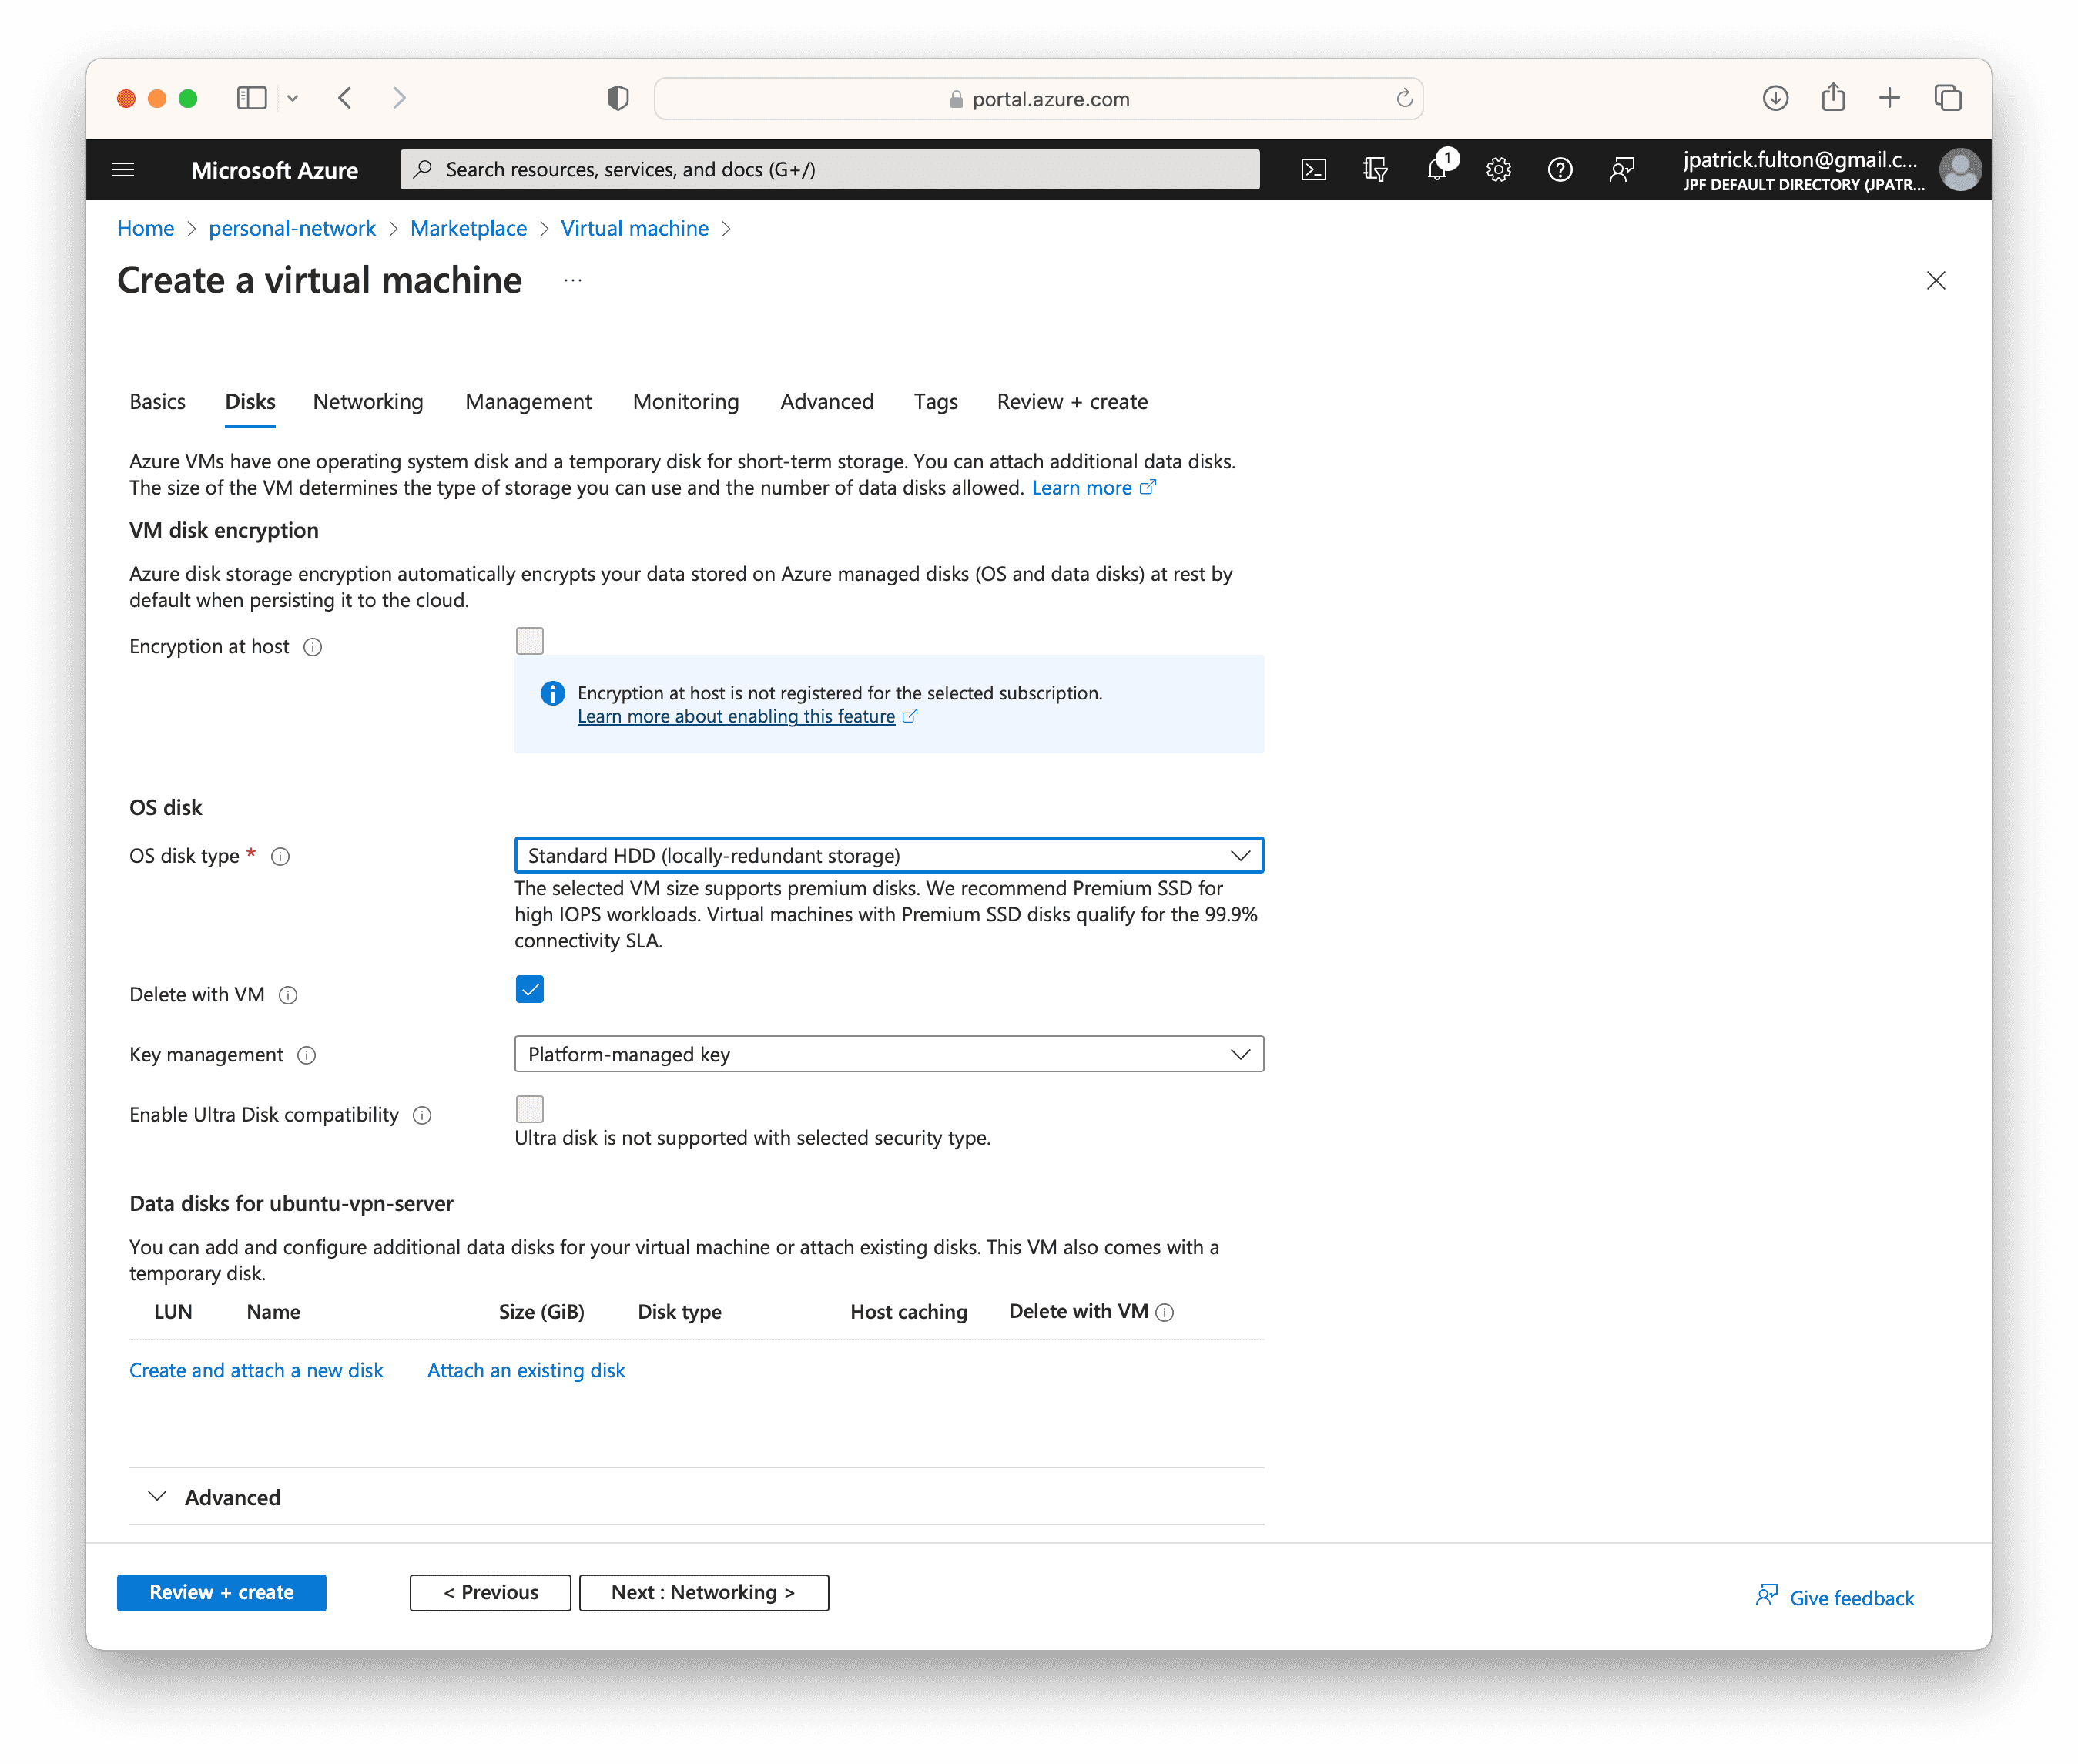
On the disks step, change the OS Disk Type to
Standard HDD (locally-redundant storage). Move on to the networking step.
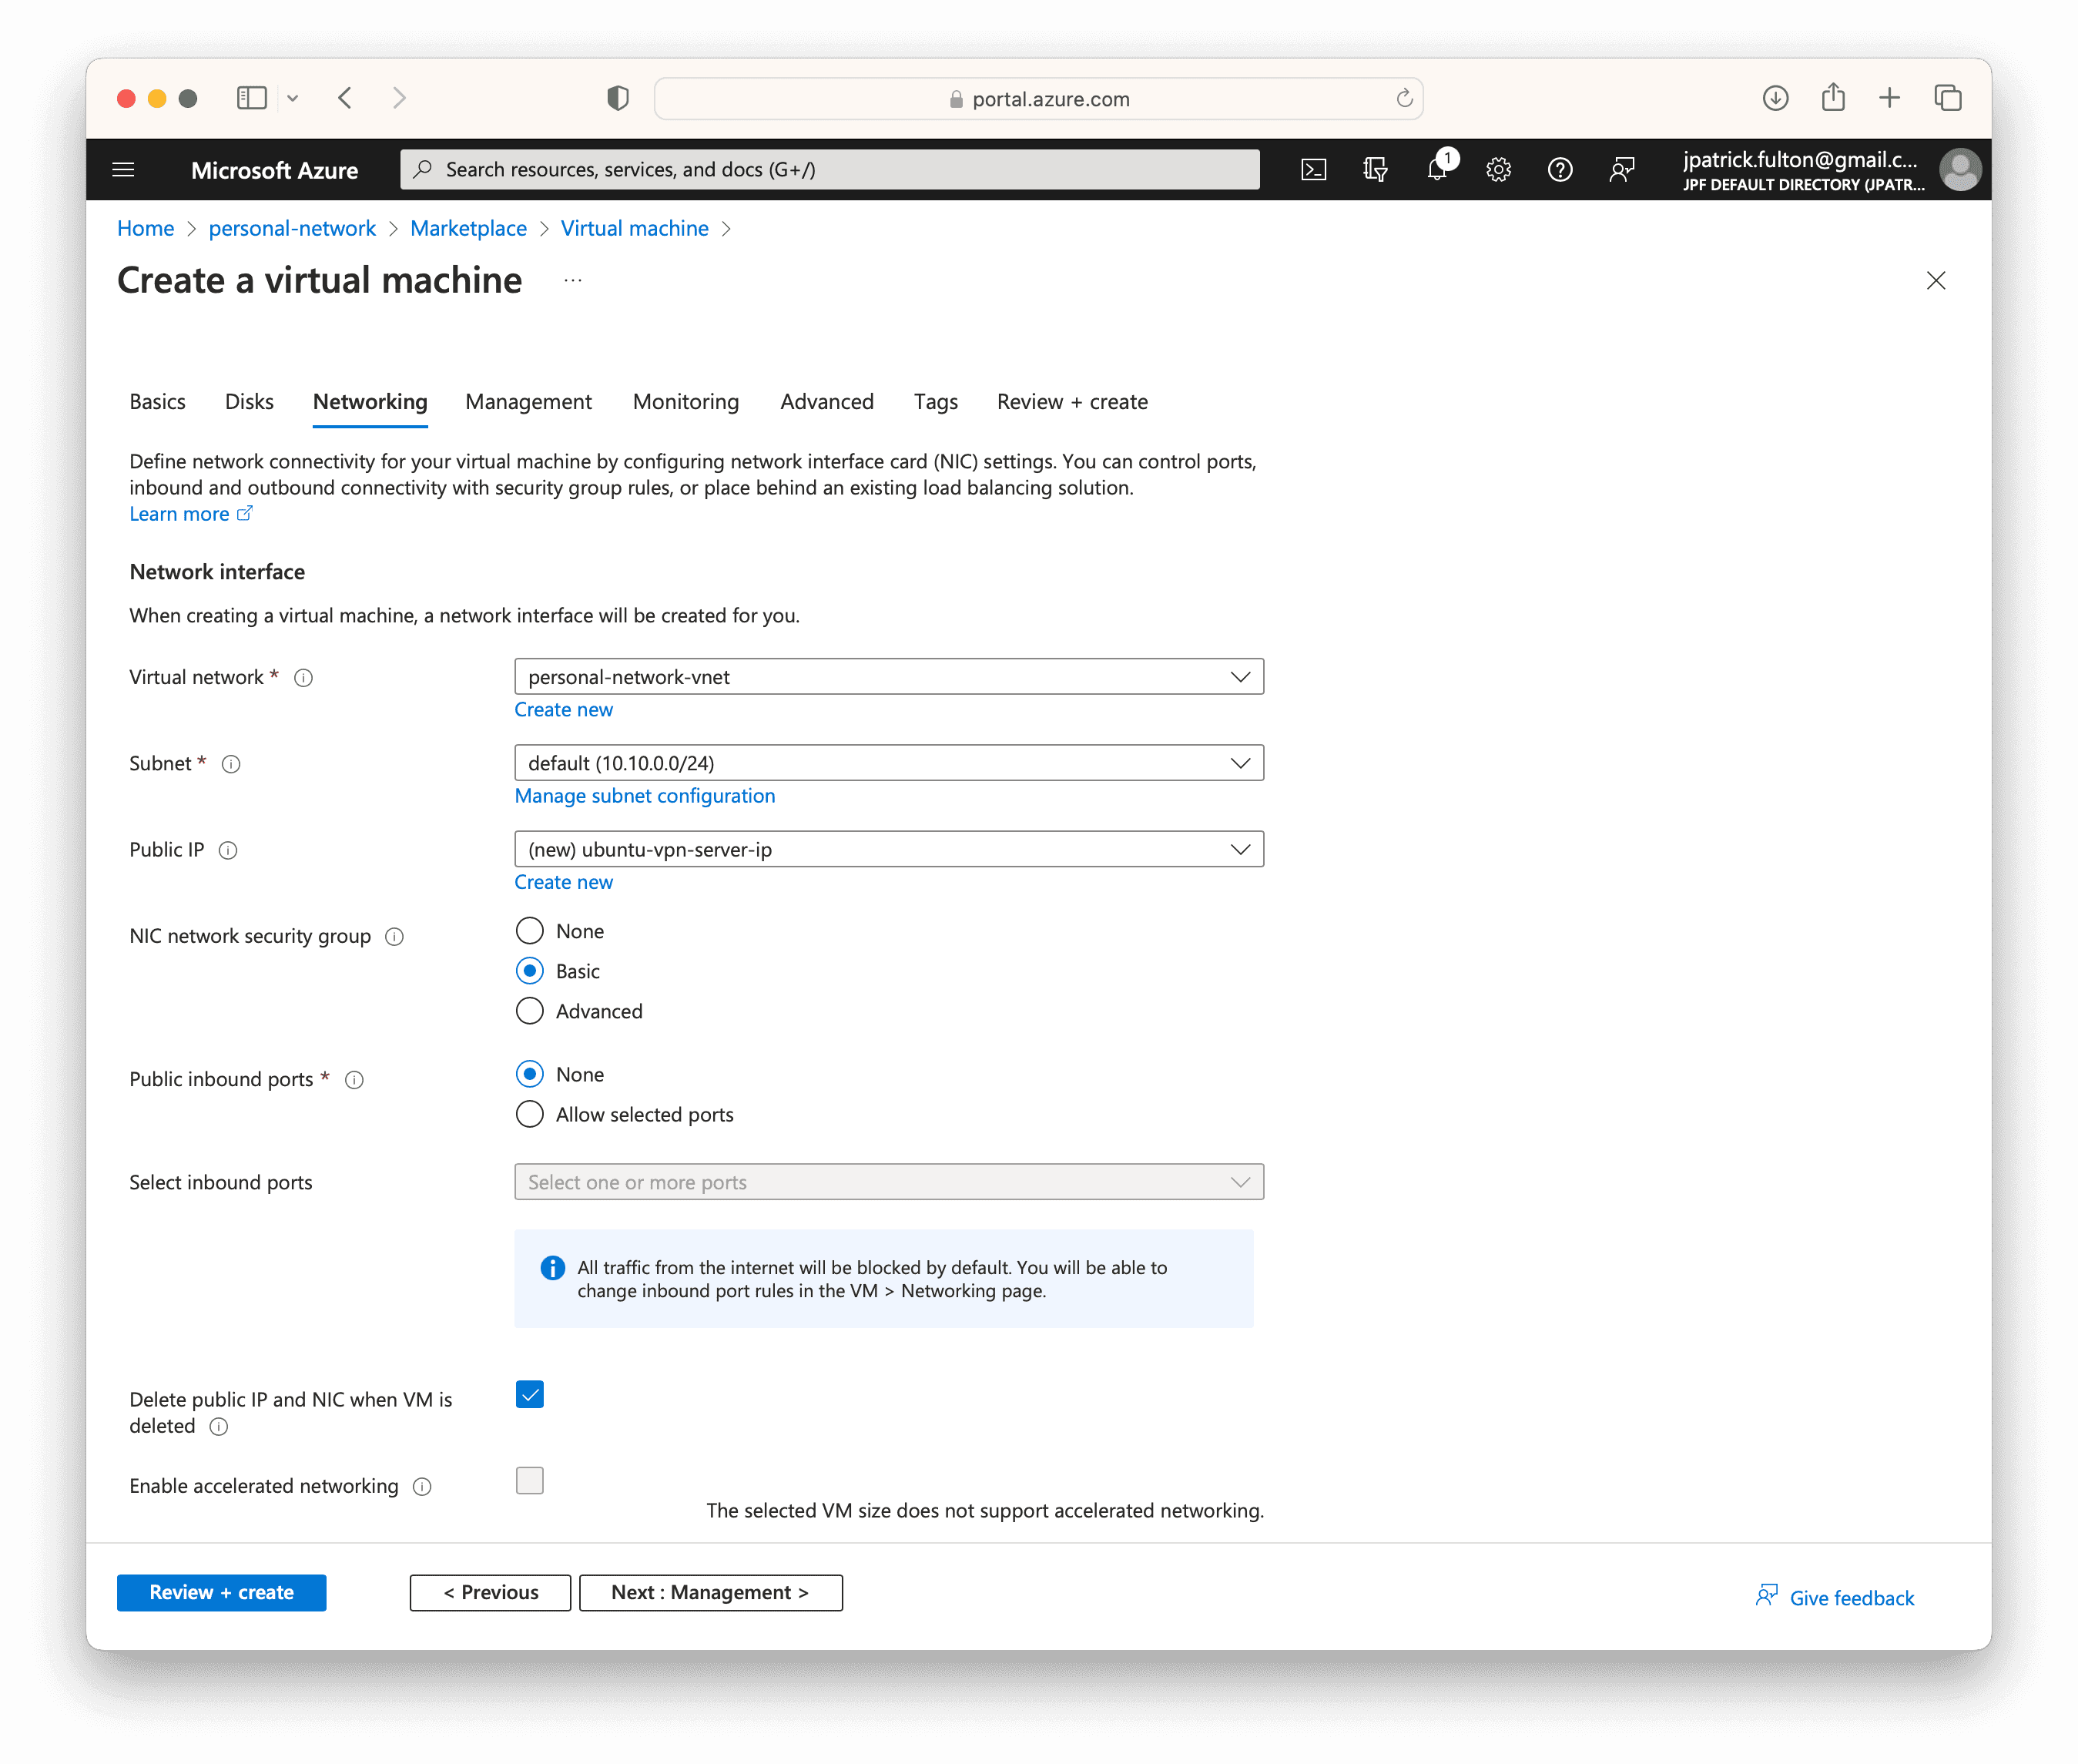
On the networking step, select the virtual network resource and ensure a new public IP address is created for the NIC. Move on to the management step.
From the management step, select the Login with Azure AD checkbox
and then select Review + create to validate and complete the deployment.
The PEM file will be downloaded at the start of the process.

Configure the Virtual Machine
Login via SSH using the PEM File
Move the PEM file downloaded during the deployment to your ~/.ssh folder
and use it to log into the newly created server. The username must match
the one you selected during the virtual machine creation process and the private
IP may be found on the Networking tab on the newly created virtual machine
in the portal.
ssh -i ~/.ssh/ubuntu-vpn-server_key.pem username@10.10.0.5Update all Packages
Update the packages from the base image using the following commands.
sudo apt update
sudo apt list --upgradeable
sudo apt upgrade
Set up Local Firewall
Next, we need to set up the local firewall. Neither the on-premise network nor the virtual network use IPv6. As a result, we should disable IPv6 on the firewall using the following this guide.
Set up a rule to allow ssh and enable the firewall with the following commands.
sudo ufw allow ssh
port 22
Rules updated
sudo ufw enable
Command may disrupt existing ssh connections. Proceed with operation (y|n)? y
Firewall is active and enabled on system startup
sudo ufw status numbered
Status: active

     To                         Action      From
     --                         ------      ----
[ 1] 22/tcp                     ALLOW IN    Anywhere
Note that the Azure NSG will prevent access to ssh from the public IP. This is particularly useful for quickly enabling external access by modifying the NSG in a pinch.
Install the OpenVPN and Easy-RSA Packages
Use the package manager to install the openvpn and easy-rsa packages.
The easy-rsa package will be used for generating keys for the tunnel.
sudo apt install openvpn easy-rsaGenerate Certificates and Keys
The first step is to copy the easy-rsa scripts to the /etc/openvpn
folder and create a certificate authority folder.
sudo make-cadir /etc/openvpn/easy-rsaEnter an interactive shell as root for the following steps with this command.
sudo -sNavigate to the /etc/openvpn/easy-rsa folder. The following commands
initialize the public key infrastructure and generates a certificate
authority that will be used to sign subsequent public / private key pairs.
cd /etc/openvpn/easy-rsa
./easyrsa init-pki
./easyrsa build-ca
Next, we need to create a set of Diffie Hellman parameters to be used by the server.
./easyrsa gen-dhFinally, we generate a certificate for the the server and sign it with the certificate authority.
./easyrsa gen-req ubuntu-vpn-server nopass
./easyrsa sign-req server ubuntu-vpn-server
Copy the outputs of the previous command to the /etc/openvpn folder
where they will be used in the OpenVPN server configuration file.
cp pki/dh.pem pki/ca.crt pki/issued/ubuntu-vpn-server.crt pki/private/ubuntu-vpn-server.key /etc/openvpn/With the server certificates and Diffie Hellman parameters ready for the server configuration, we need to create a certificate for the client. Ideally, each OpenVPN client will use a separate certificate to allow them to be identified by the server and also revoked if needed. The outputs from these commands will be used in a separate step when creating the client configuration file.
./easyrsa gen-req home-client nopass
./easyrsa sign-req client home-client
Exit the interactive shell.
exitThe last secret needed for the OpenVPN configuration is a TLS authorization key. This key will be used in TLS authentication where it will participate in the creation of an HMAC signature for all SSL/TLS handshake packets to mitigate DoS attacks against the server. That secret is generated with the following commands.
cd /etc/openvpn
sudo openvpn --genkey secret ta.key
Configure the Server
In an effort to replace the Azure Virtual Network Gateway with a solution of similar cryptographic strength and features, I endeavored to use many equivalent features of OpenVPN in this implementation.
HMACpacket signature validation using a pre-shared key andSHA256hashingAES-256-GCMdata channel cipher- Disallow reuse of client certificates
- Drop to unprivileged execution context following initialization
The primary difference between this OpenVPN configuration and the configuration
used by the Azure Virtual Network Gateway is that this configuration operates
on UDP rather than TCP.
Create the OpenVPN Server Configuration File
Create a server configuration file based on this example in
/etc/openvpn folder. Line 1 needs to be configured to represent the
subnet on which VPN clients will receive their IP addresses. Line 29 requires
configuration to match the address space of the Azure virtual network.
server 10.10.10.0 255.255.255.0topology subnet

proto udp
port 1194
dev tun

auth SHA256
cipher AES-256-GCM

ca ca.crt
cert server.crt
key server.key  # This file should be kept secret
dh dh.pem
tls-auth ta.key 0 # This file should be kept secret

;duplicate-cn # Uncomment to allow multiple clients using the same cert for debugging
keepalive 10 120
max-clients 5
explicit-exit-notify 1

persist-key
persist-tun

user nobody
group nogroup

# Push a route to the virtual network address space
push "route 10.10.0.0 255.255.0.0"
# Push the internal Azure virtual network DNS server
push "route 168.63.129.16 255.255.255.255"
push "dhcp-option DNS 168.63.129.16"

status /var/log/openvpn/openvpn-status.log
verb 3
A current version of this configuration file is available here.
Start the OpenVPN Service
Once the server configuration is in place, the OpenVPN service may be
started. Note the syntax of the start parameter. systemctl supports
multiple openvpn daemon configurations that may be started and stopped
independently using the syntax openvpn@configuration-name.
sudo systemctl start openvpn@homeserver
sudo systemctl status openvpn@homeserver
The systemd journal can be then be checked using the following
command.
sudo journalctl -u openvpn@homeserver -xeCreate a DNS Entry for the Server Public IP
Using the Azure portal, we can associate a domain name with the public IP
address used by the VPN server. These DNS names come in the form of
*.region.cloudapp.azure.com. Following creation of a DNS label for the public
IP, we can easily create a CNAME record to point to it from a custom domain
and use this in our client configuration file.
To create a DNS label, navigate to the public IP resource and select Settings > Configuration to set the DNS label.
Configure the Local Server Firewall
The local firewall needs to be updated to both allow incoming traffic on the OpenVPN UDP port and to masquerade traffic coming from the tunnel into the virtual network.
Enable incoming traffic to the OpenVPN daemon with the following commands.
sudo ufw allow proto udp from 0.0.0.0/0 to any port 1194
sudo ufw status numbered
Status: active

     To                         Action      From
     --                         ------      ----
[ 1] 22/tcp                     ALLOW IN    Anywhere
[ 2] 1194/udp                   ALLOW IN    Anywhere
Instruct the firewall to allow routed traffic from the tunnel network device to the main NIC with the following commands.
sudo ufw route allow in on tun0 out on eth0
sudo ufw status numbered
Status: active

     To                         Action      From
     --                         ------      ----
[ 1] 22/tcp                     ALLOW IN    Anywhere
[ 2] 1194/udp                   ALLOW IN    Anywhere
[ 3] Anywhere on eth0           ALLOW FWD   Anywhere on tun0
Finally, network address translation rules need to be added to the
firewall. ufw does not support these rules with its command line
interface. As a result, we will add iptables rules to the
/etc/ufw/before.rules file. Place the following lines at the top of the
file and configure the source subnet to match the configuration of the OpenVPN
server.
# NAT table rules
*nat
:POSTROUTING ACCEPT [0:0]

# Forward traffic through eth0 - Change to match your out-interface
-A POSTROUTING -s 10.10.10.0/24 -o eth0 -j MASQUERADE
# don't delete the 'COMMIT' line or these nat table rules won't
# be processed
COMMIT
# End NAT table rules
Enable and disable the firewall to load the masquerade rules.
sudo ufw disable && sudo ufw enableConfigure the Server Network Security Group
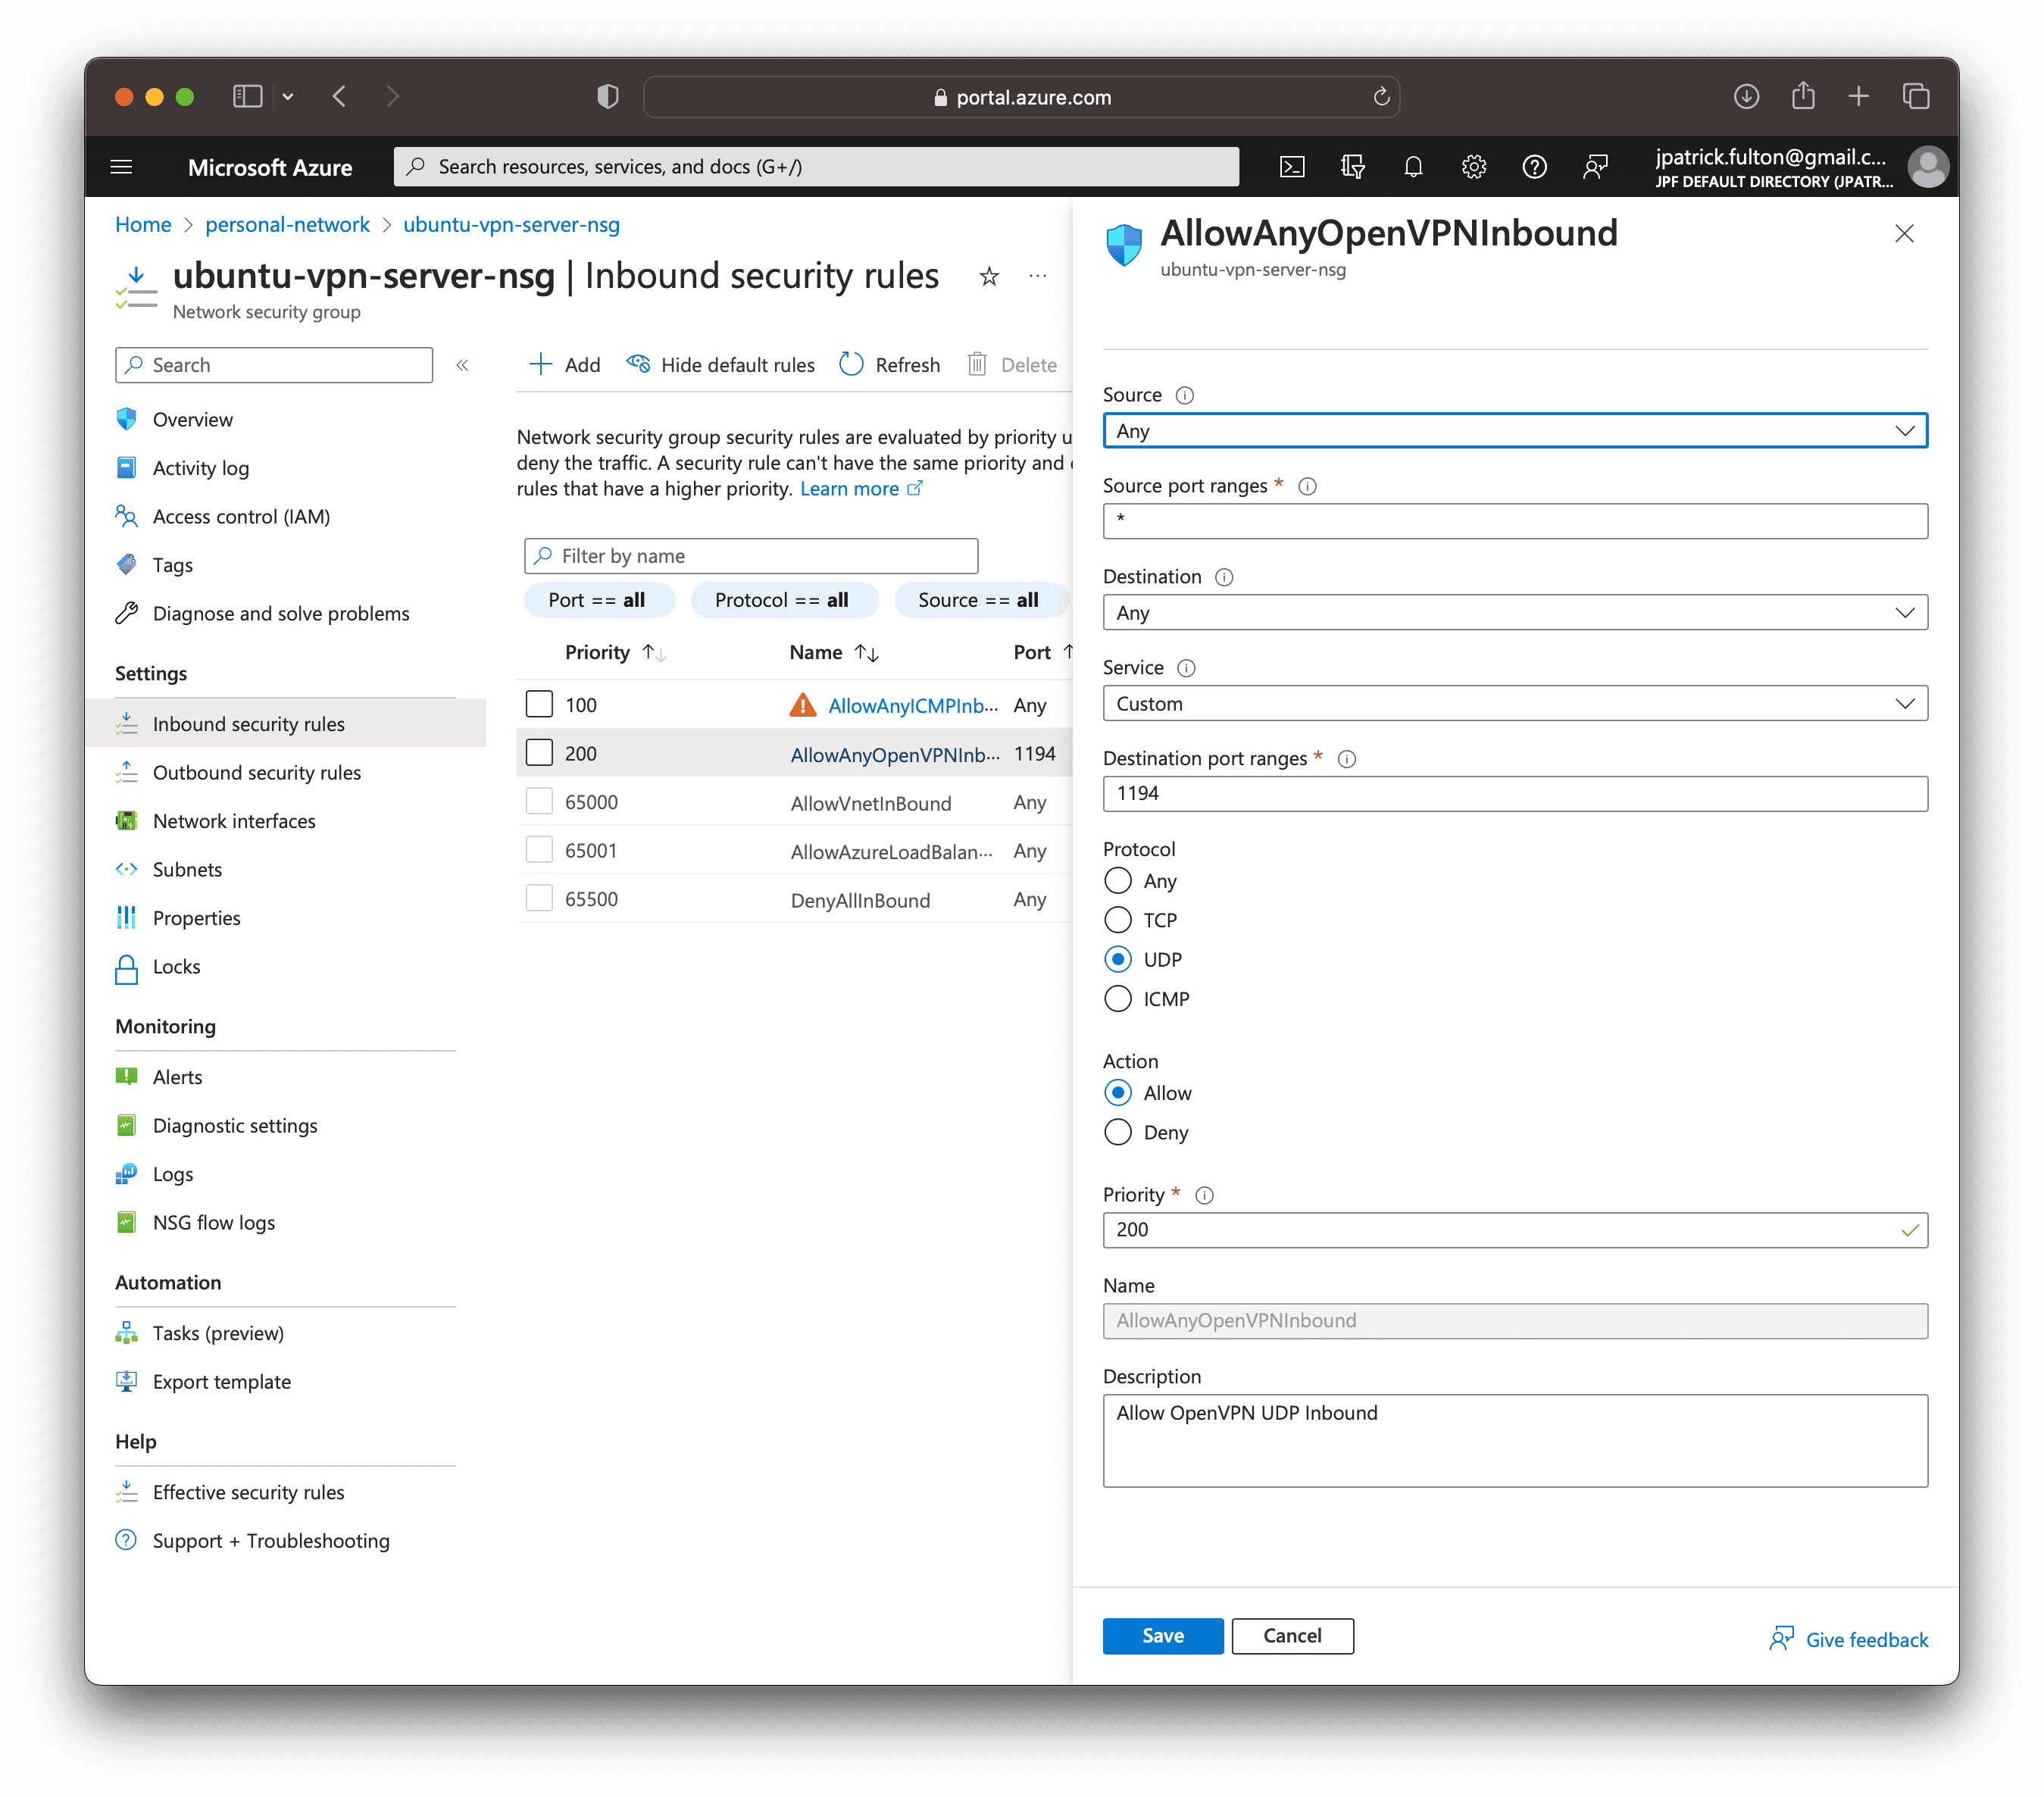
In the final server configuration step, the Azure Network Security Group associated with the VPN server network interface needs to be adjusted to allow incoming traffic on the OpenVPN UDP port as well.
From the portal, navigate to the network security group resource. Select Settings > Inbound security rules > Add to create an inbound rule as shown below.
Configure the Client
With the server configuration running and in place, we need to create a client configuration file. The client configuration needs to match the features of the server configuration and then must be securely transferred to the client device.
Create the Client Configuration File
To create the client configuration file, we will need access to the following files as created in earlier steps. The contents of each file need to be copied into the various sections of the client configuration template.
/etc/openvpn/ca.crt # Certificate authority public key
/etc/openvpn/ta.key # TLS Authentication Static Secret
/etc/openvpn/easy-rsa/pki/issued/home-client.crt # Client public key
/etc/openvpn/easy-rsa/pki/private/home-client.key # Client private key
The template below has been created to match the server configuration from above. The creation of the client configuration should be performed on the server to avoid the need to move the pre-shared secrets and keys.
client

remote <SERVER DNS OR IP HERE> 1194
remote-cert-tls server

dev tun
proto udp
resolv-retry infinite
nobind

persist-key
persist-tun

auth SHA256
cipher AES-256-GCM
tls-timeout 30
tls-version-min 1.2
key-direction 1

verb 3

# Downgrade privileges after initialization (non-Windows only)
user nobody
group nogroup

<ca>
-----BEGIN CERTIFICATE-----
<PASTE SERVER CA CERTIFICATE HERE>
-----END CERTIFICATE-----
</ca>

<tls-auth>
-----BEGIN OpenVPN Static key V1-----
<PASTE TA KEY HERE>
-----END OpenVPN Static key V1-----
</tls-auth>

<cert>
-----BEGIN CERTIFICATE-----
<PASTE CLIENT CERTIFICATE HERE>
-----END CERTIFICATE-----
</cert>

<key>
-----BEGIN PRIVATE KEY-----
<PASTE CLIENT KEY HERE>
-----END PRIVATE KEY-----
</key>
A current version of this client configuration template is available here.
Copy the Client Configuration File to a Local Machine
The next step in this process is to securely copy the OpenVPN client configuration from the server where it was created to a local machine. Use scp to move the file. The configuration file includes a private key and a shared static key for use in the TLS authentication process.
When following this step, it is an excellent idea to ensure that your macOS hard drive is encrypted via FileVault and that your iCloud account is end-to-end encrypted via Advanced Data Protection.
scp -i ~/.ssh/ubuntu-vpn-server_key.pem jpfulton@ubuntu-vpn-server.private.jpatrickfulton.com:/home/jpfulton/azure-personal-network.ovpn .Install the Configuration and Test a Client
With the client configuration downloaded to a local machine, one of several OpenVPN clients can be configured and then tested. Ubuntu Desktop includes an OpenVPN client. Additionally, Tunnelblick may be used on macOS and OpenVPN Connect may be used on Windows.
In the next post, I will discuss setting up the client configuration on a Firewalla device.
Tear Down the Azure Virtual Network Gateway
With a replacement solution in place, the Azure Virtual Network Gateway created in the earlier post can be taken down and the associated resources removed.
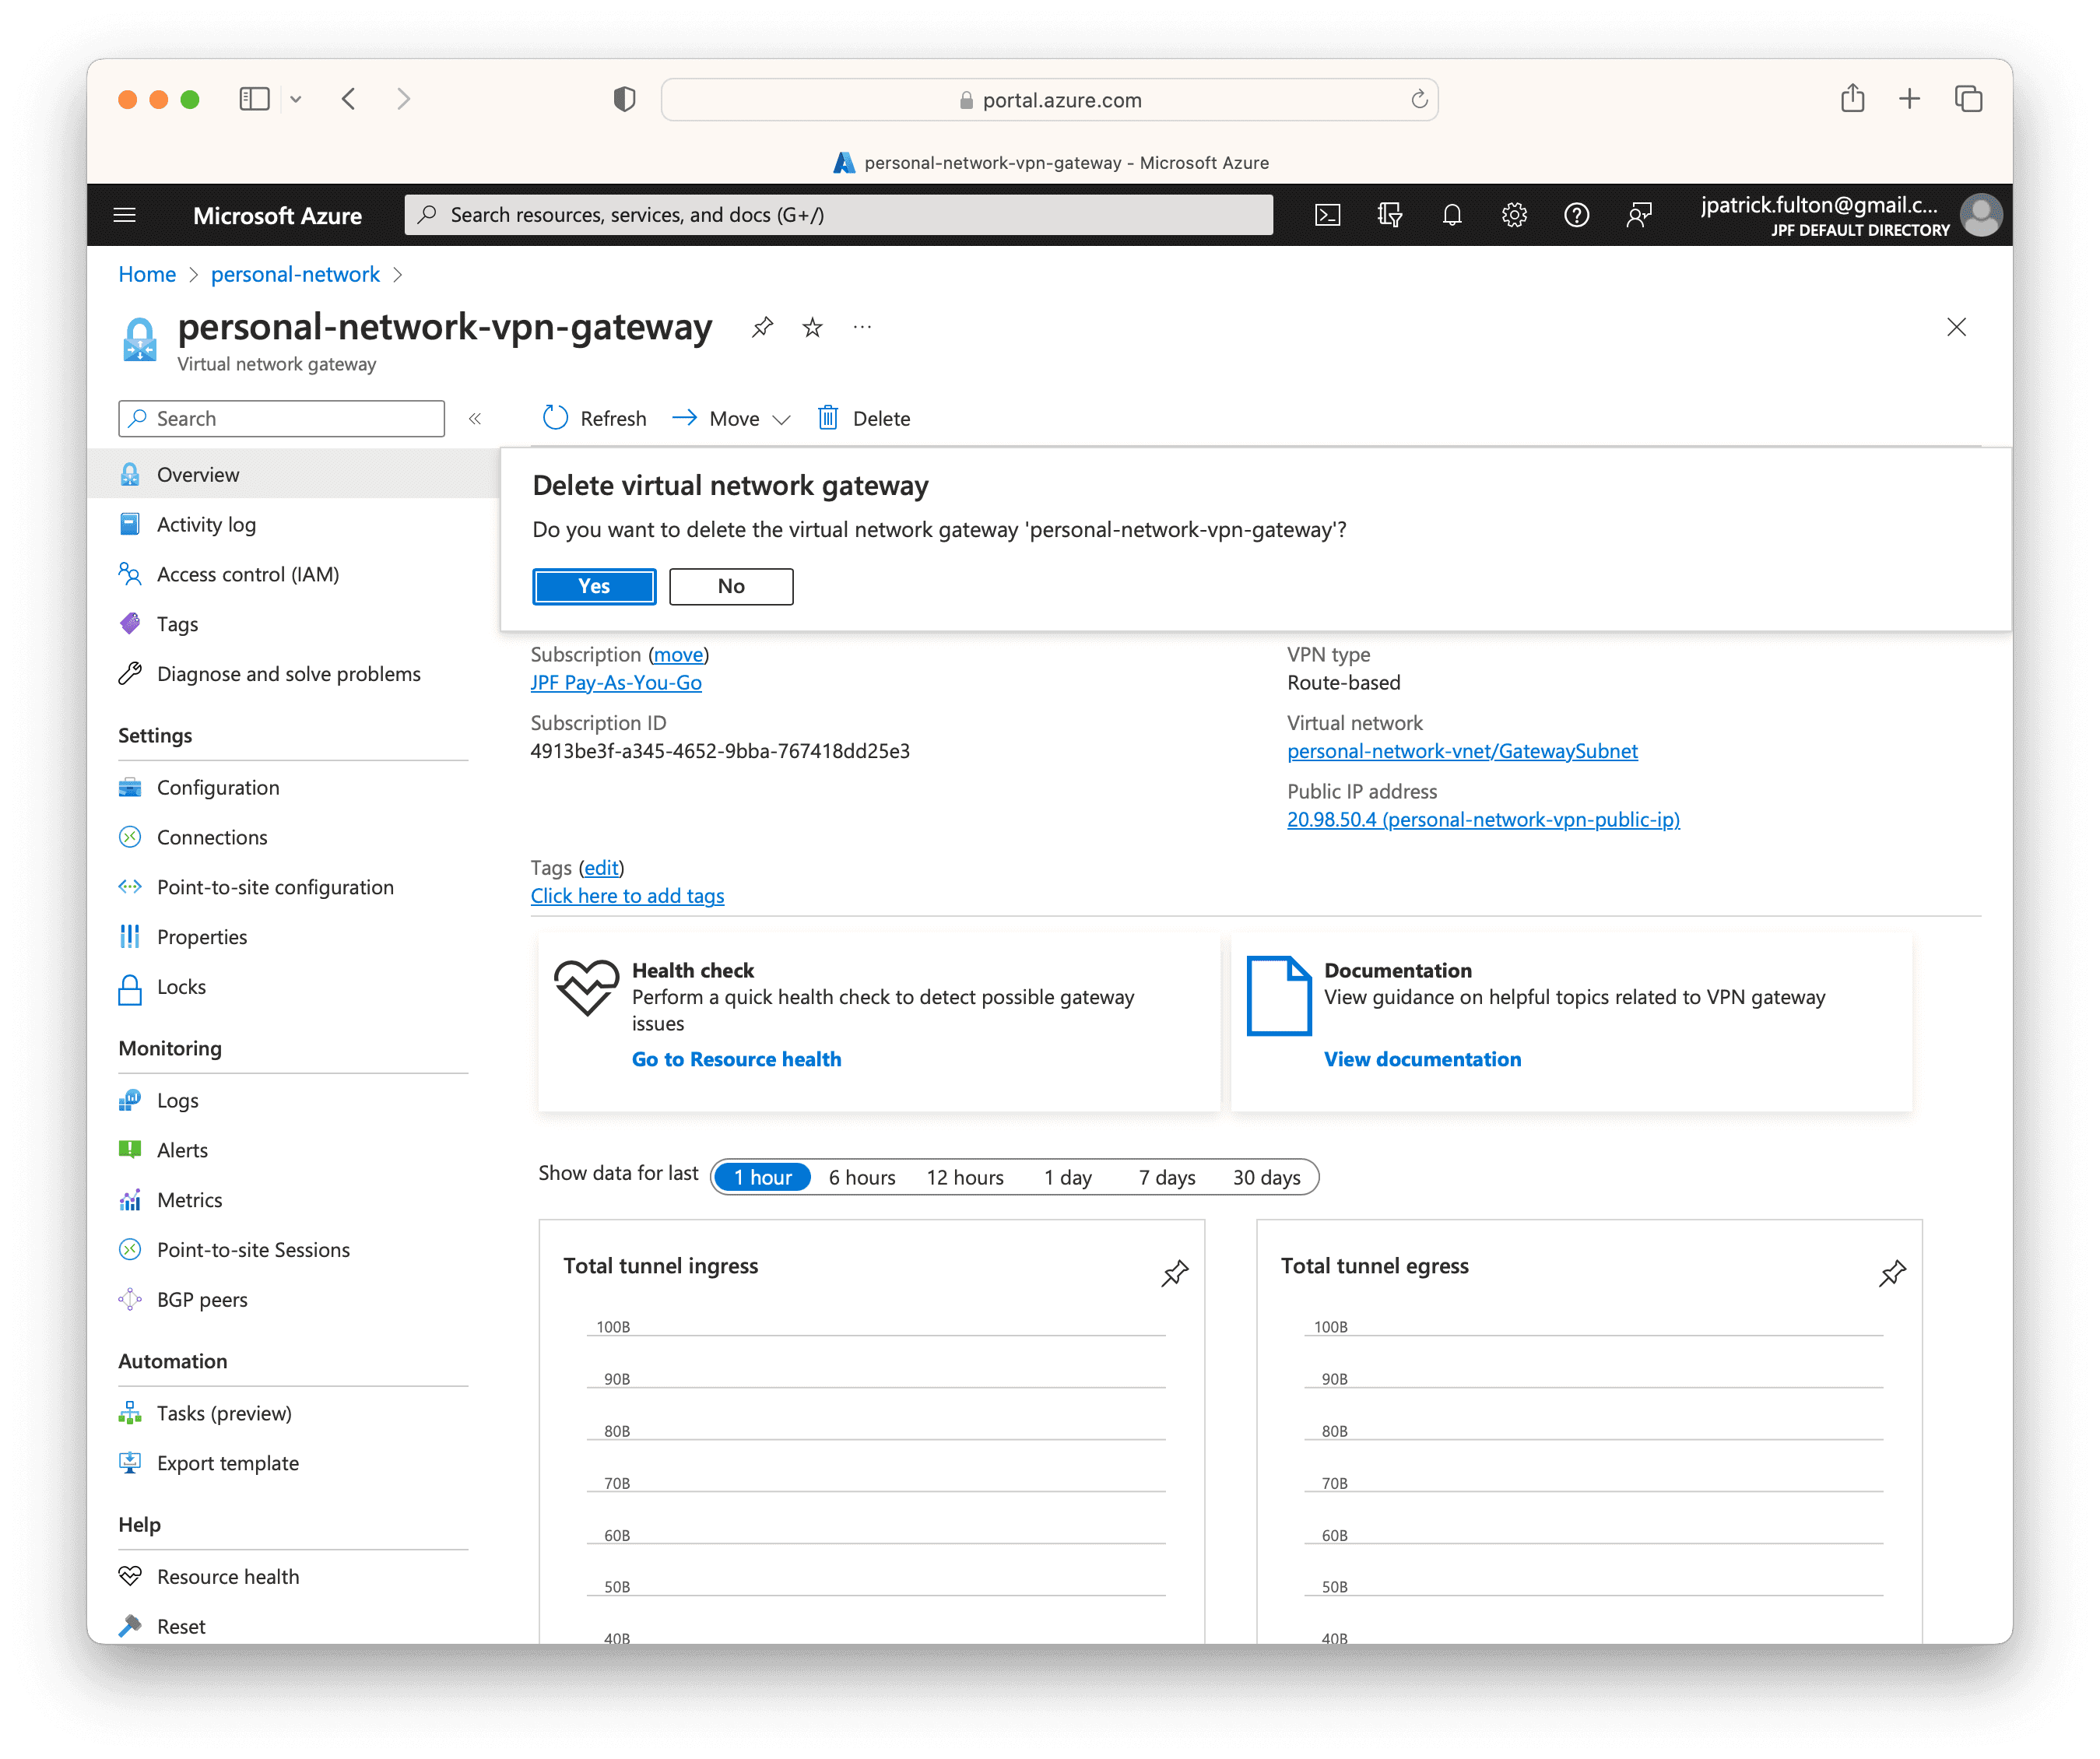
Remove the Virtual Network Gateway Resource
Navigate to the Virtual Network Gateway and select Delete.
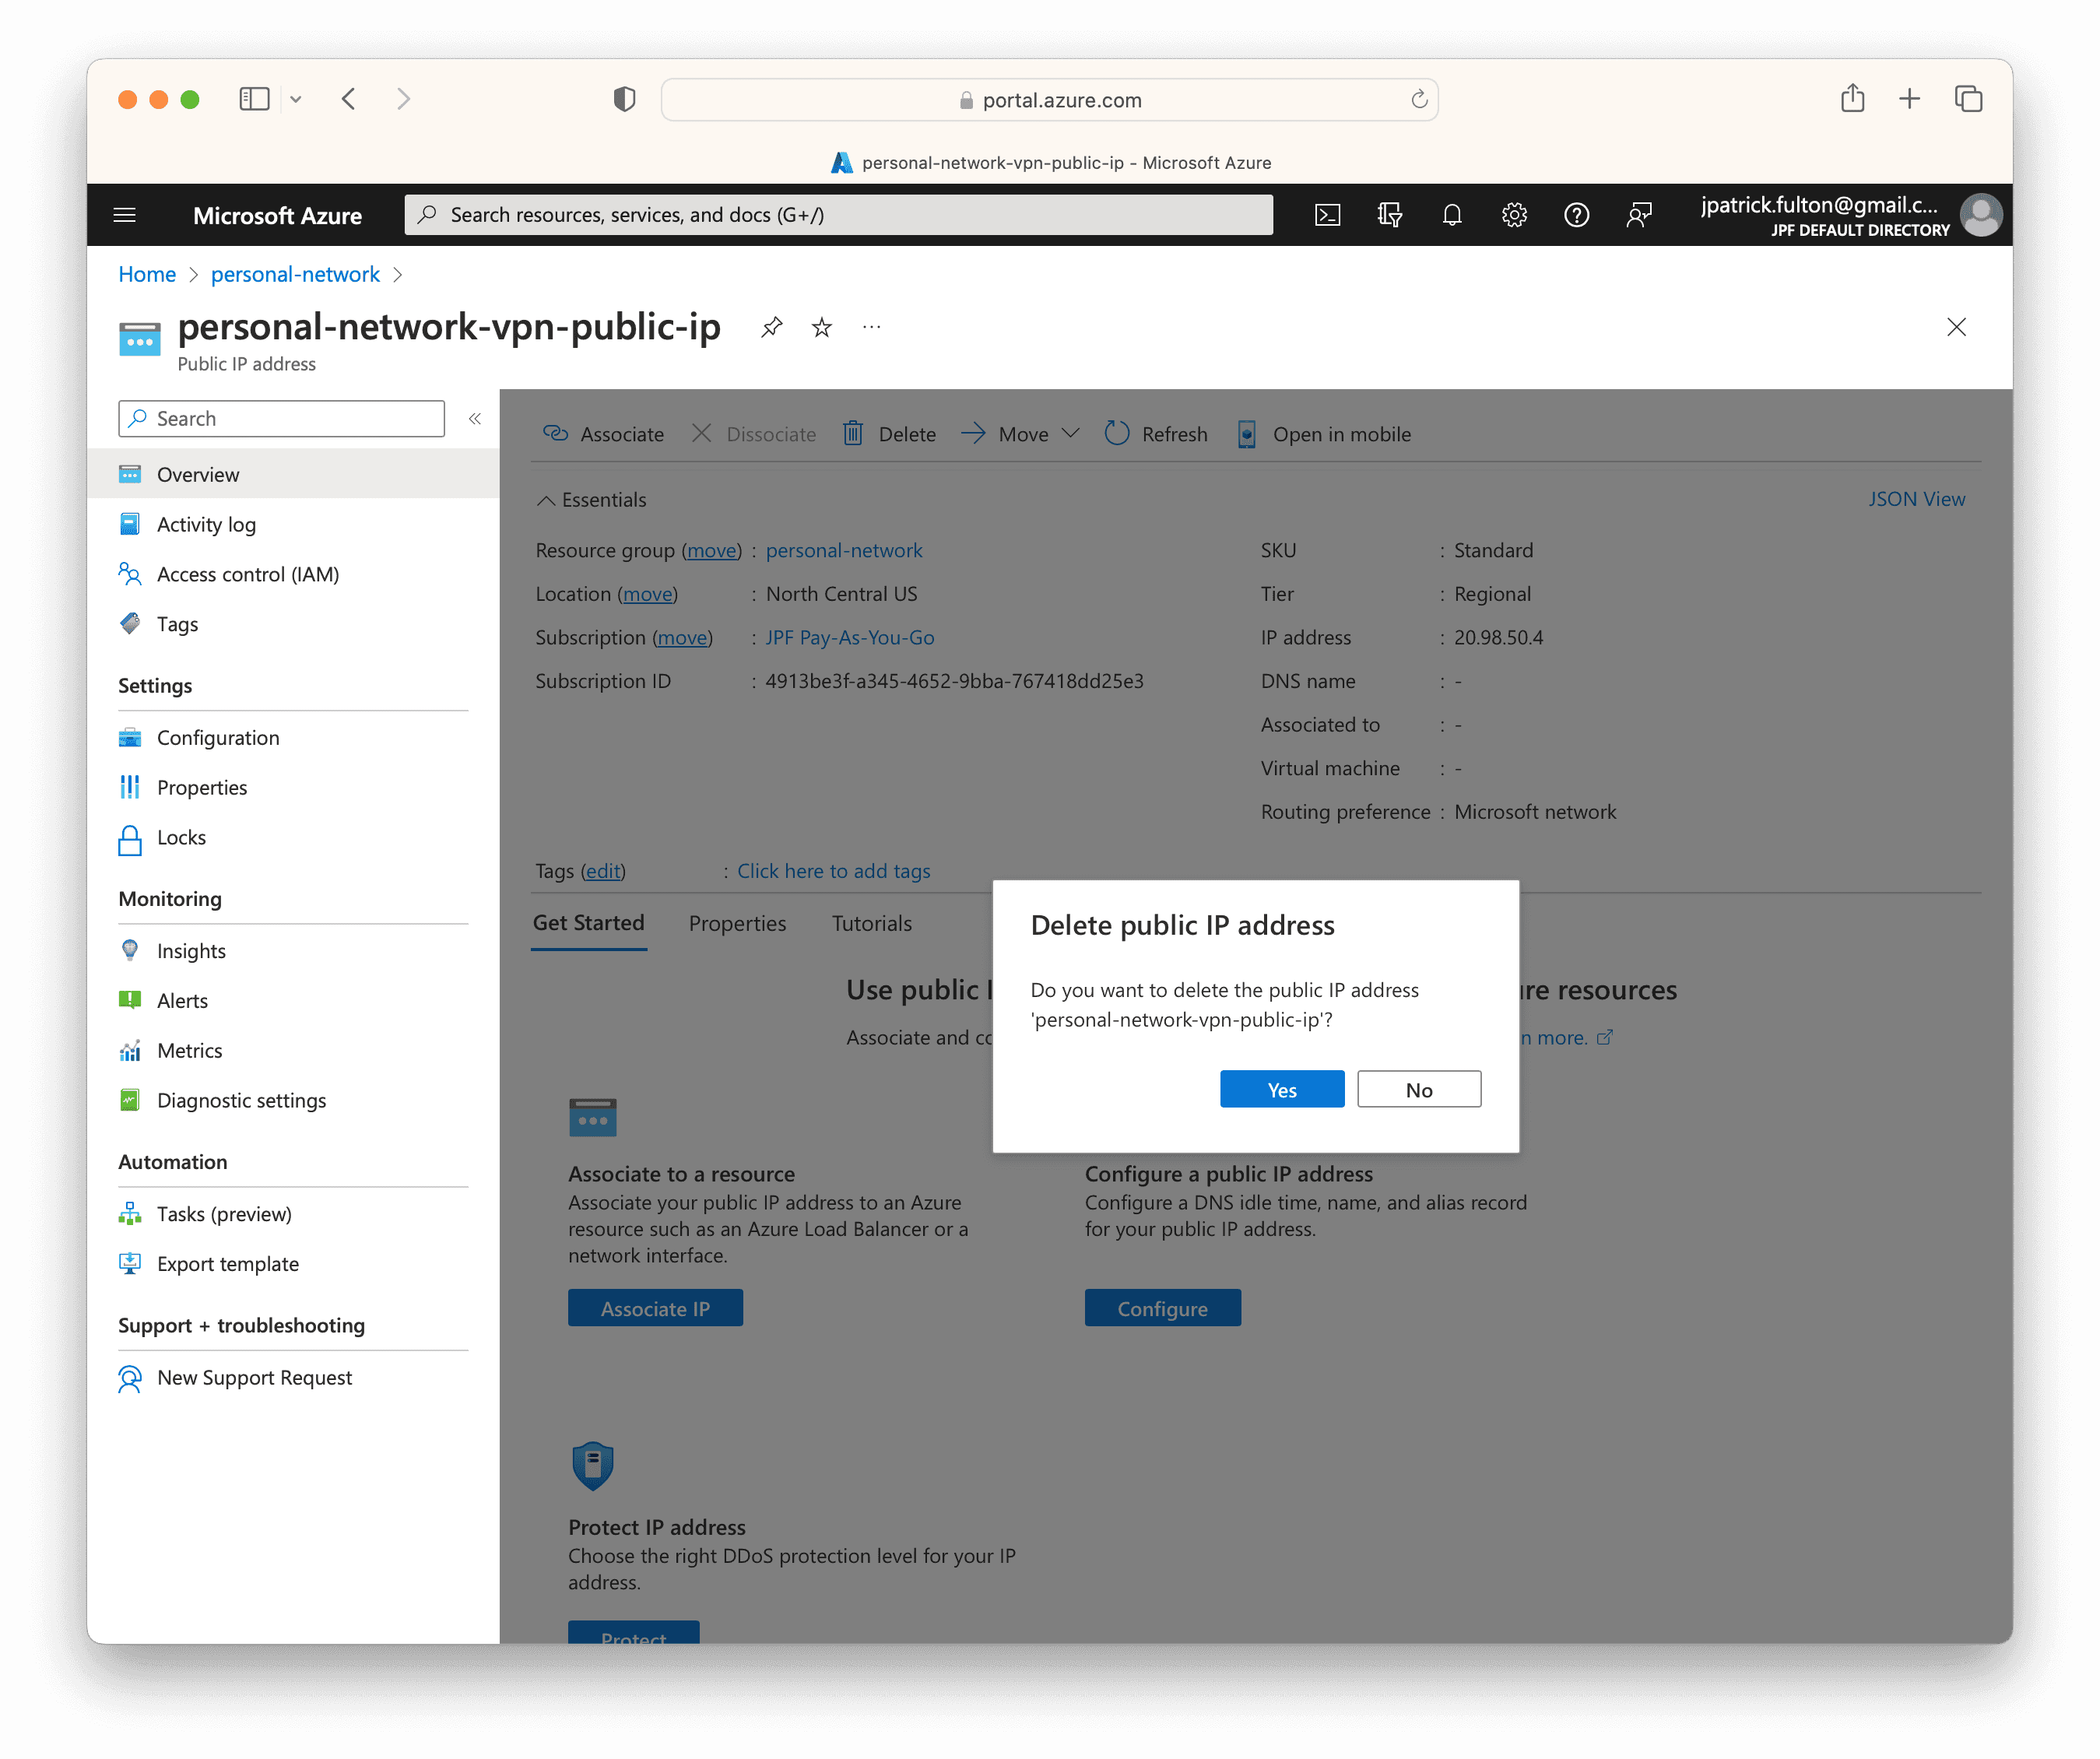
Remove the Public IP
Find and delete the public IP that was associated with the network gateway.
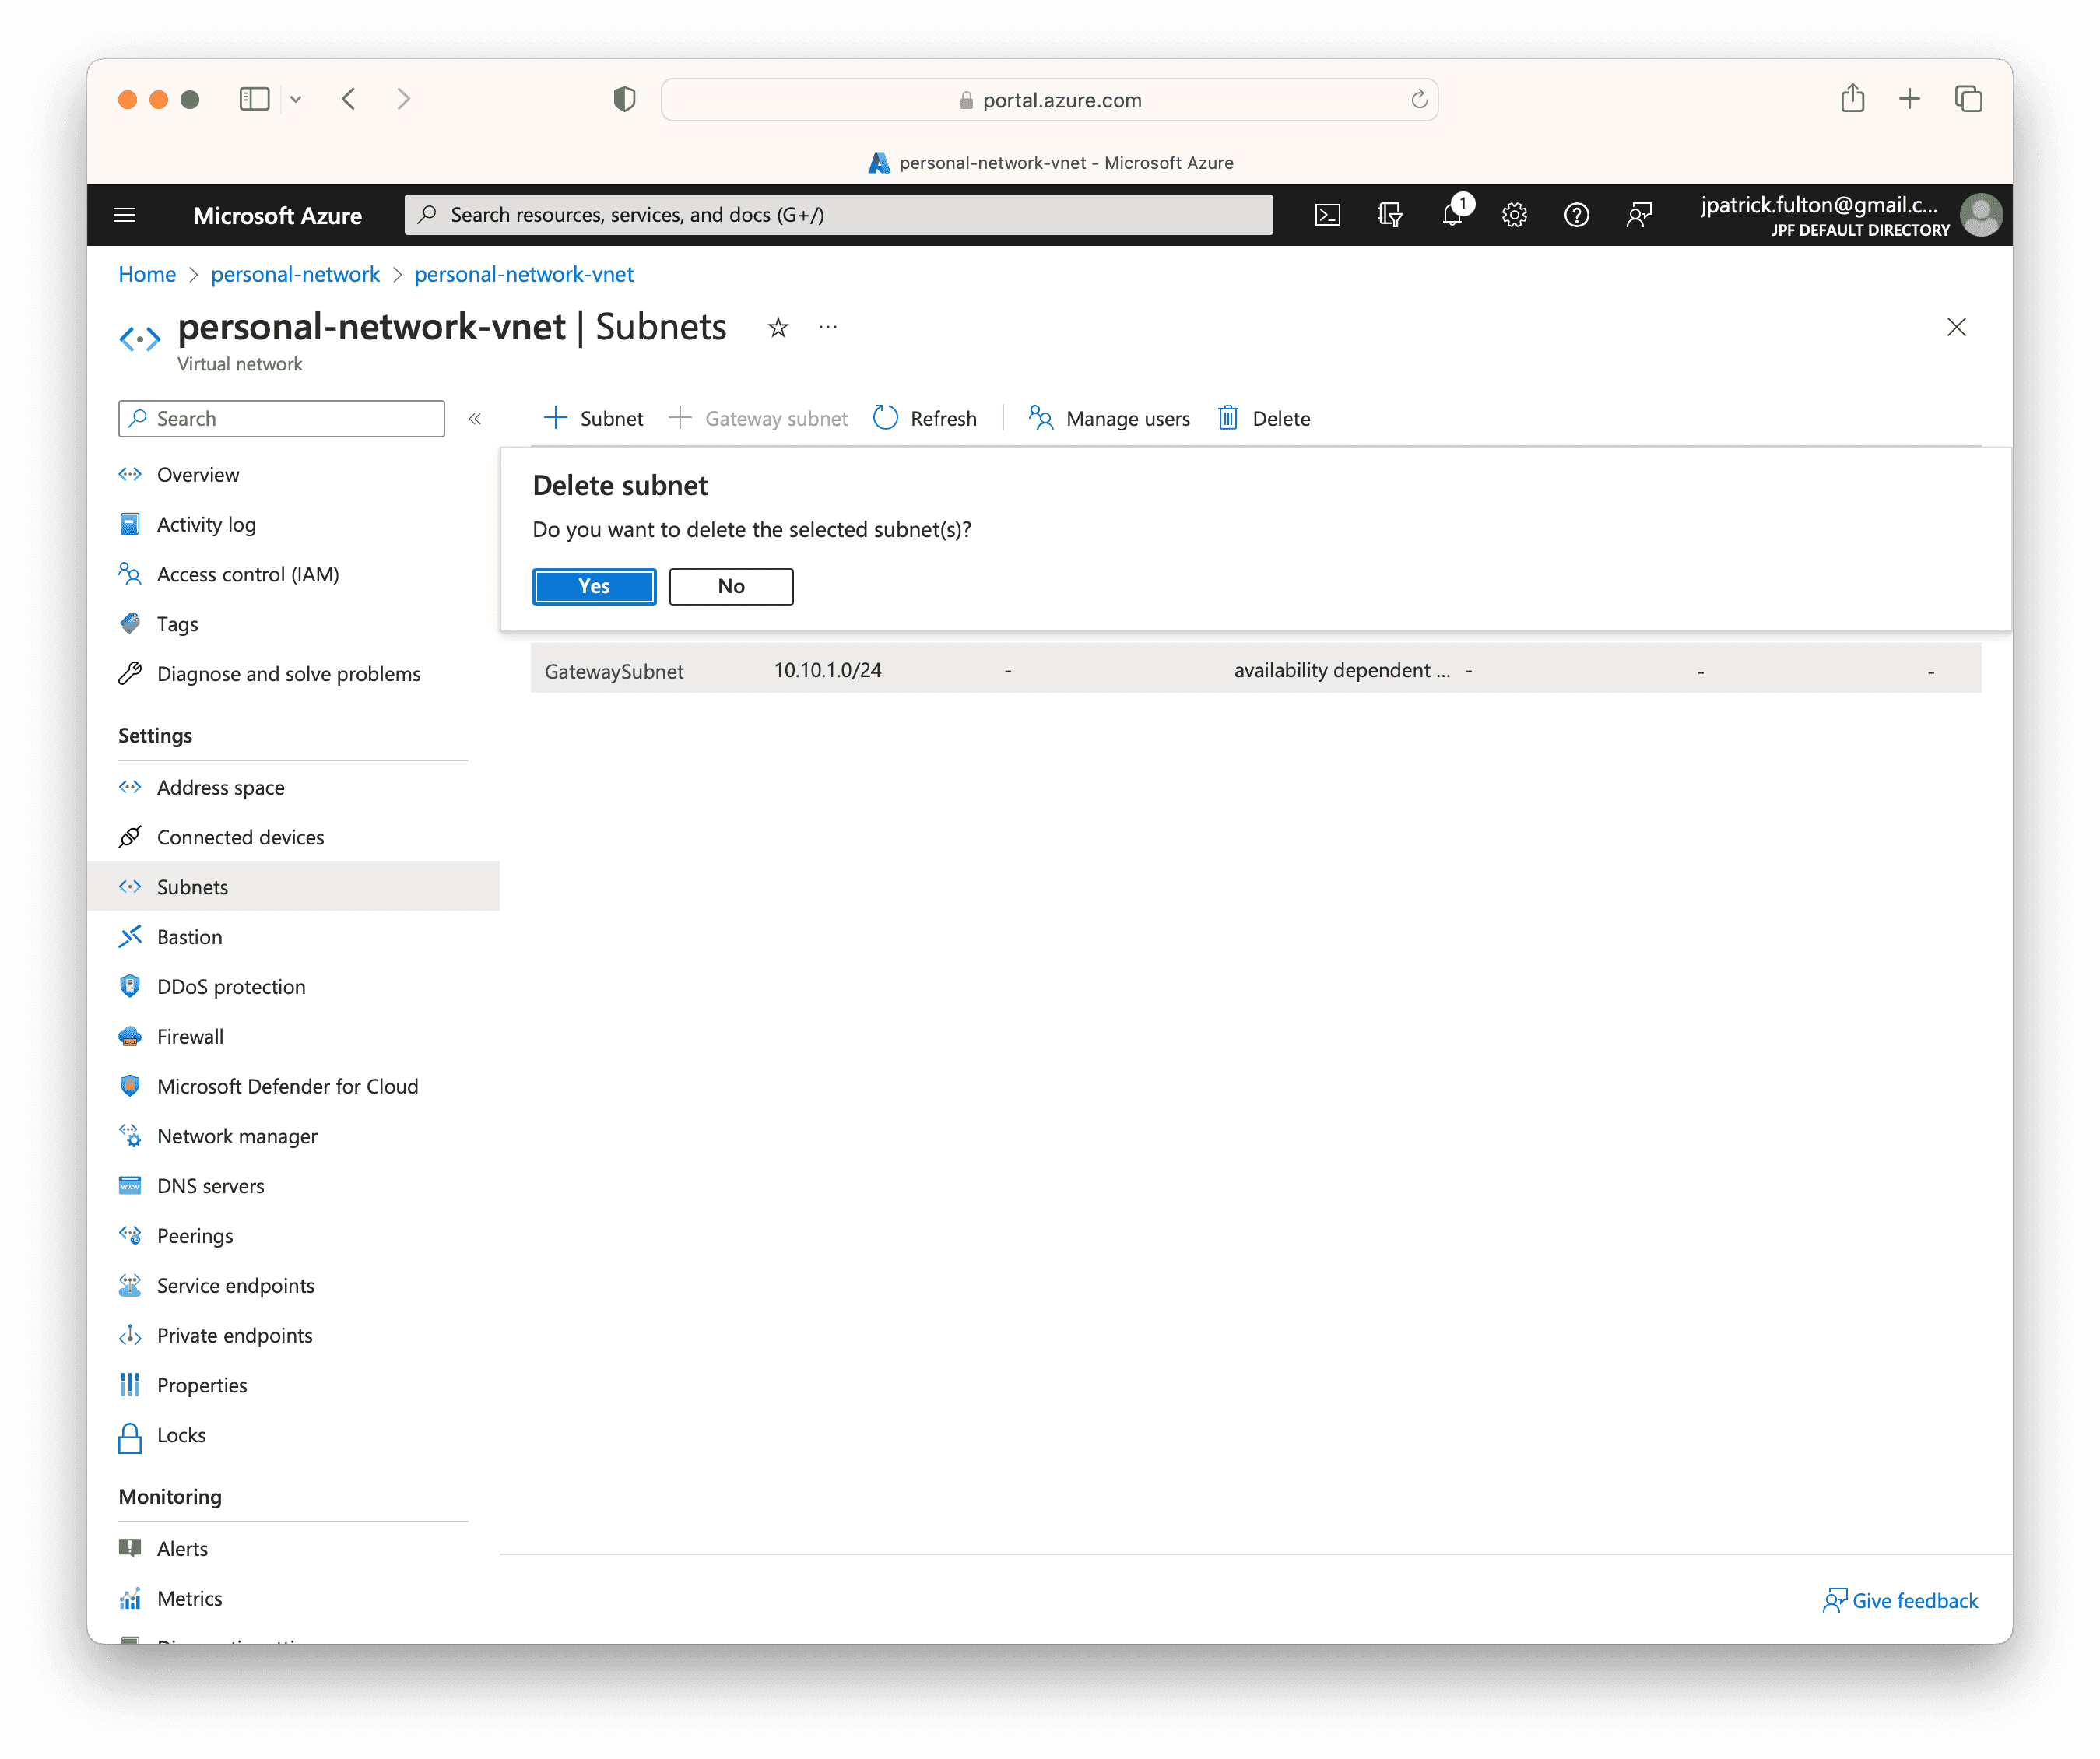
Remove the Gateway Subnet from the Virtual Network
Navigate to the virtual network resource and remove the unused gateway subnet.

Written by J. Patrick Fulton.